Wrinkled, curled, or uneven cryosections are some of the most common frustrations in frozen sectioning. While blade condition and temperature often get the blame, one of the most overlooked causes is improper use or maintenance of the anti-roll plate cryostat assembly.
The anti-roll plate plays a critical role in controlling tissue flow during sectioning. When it’s damaged, misaligned, or used incorrectly, section quality can deteriorate quickly.
Below are the most common anti-roll plate cryostat mistakes that negatively impact section quality — and how to avoid them.
1. Using a Chipped or Worn Anti-Roll Plate Edge
Anti-roll plates are wear components. Over time, the glass edges can become:
Chipped
Nicked
Uneven
Rounded
Even minor damage along the edge can cause tissue to:
Catch during sectioning
Curl upward
Wrinkle or fold
Why this ruins sections
A damaged edge disrupts the smooth guidance of tissue away from the blade, causing inconsistent contact and poor section control.
Best practice
If your anti-roll plate cryostat has multiple usable edges, rotate it regularly and replace it once all edges show wear.
2. Incorrect Anti-Roll Plate Positioning
An anti-roll plate must be positioned precisely relative to the blade edge. Common positioning errors include:
Plate too far from the blade
Plate contacting the blade
Plate misaligned laterally
Why this ruins sections
Incorrect positioning changes how the tissue exits the blade, leading to:
Excessive compression
Wrinkling
Inconsistent section thickness
Best practice
Adjust the anti-roll plate according to manufacturer recommendations and verify alignment whenever the blade is changed.
3. Assuming Blade Issues Are Always the Cause
When section quality drops, many users immediately replace the blade — even when the blade is still sharp.
Why this ruins sections
A worn or damaged anti-roll plate cryostat can produce poor sections even with a new blade, leading to unnecessary blade changes without solving the real issue.
Best practice
Inspect the anti-roll plate first when section quality declines, especially if blade changes don’t improve results.
4. Improper Cleaning of the Anti-Roll Plate
Anti-roll plates, especially glass plates, can be easily damaged by:
Abrasive wipes
Harsh chemicals
Scraping frozen debris
Why this ruins sections
Scratches and surface damage create drag and uneven tissue guidance, which directly impacts section smoothness.
Best practice
Clean the anti-roll plate gently using non-abrasive materials and approved cleaning agents. Never scrape frozen material off the plate.
5. Using the Wrong Anti-Roll Plate for the Cryostat Model
Not all anti-roll plates are interchangeable. Using the wrong plate can result in:
Poor fit
Incorrect blade clearance
Inconsistent alignment
Why this ruins sections
Even slight differences in size or geometry can affect tissue control and section quality.
Best practice
Always use an anti-roll plate cryostat replacement designed specifically for your cryostat model.
6. Ignoring the Anti-Roll Plate as a Routine Maintenance Item
Many labs treat anti-roll plates as permanent components rather than consumable wear parts.
Why this ruins sections
Over time, gradual wear leads to subtle quality degradation that becomes “normal” — until sectioning becomes unreliable.
Best practice
Include the anti-roll plate in routine cryostat maintenance checks and replace it proactively before section quality suffers.
7. Expecting the Anti-Roll Plate to Fix Temperature Issues
While the anti-roll plate is essential, it cannot compensate for:
Incorrect specimen temperature
Improper chamber temperature
Poor tissue freezing
Why this ruins sections
Misattributing temperature problems to hardware leads to unnecessary adjustments and frustration.
Best practice
Ensure temperature settings are correct before adjusting or replacing the anti-roll plate cryostat components.
When to Replace an Anti-Roll Plate Cryostat Component
You should strongly consider replacement if:
All usable edges show wear or chipping
Section quality declines despite proper blade and temperature settings
Wrinkling persists across multiple specimens
The plate no longer aligns consistently
Replacing a worn anti-roll plate is often one of the simplest and most cost-effective ways to restore clean cryosectioning.
Final Thoughts
The anti-roll plate cryostat is a small component with a major impact on section quality. Many sectioning problems attributed to blades or technique are actually caused by plate wear, misalignment, or improper handling.
By understanding these common mistakes and maintaining the anti-roll plate as a consumable component, labs can:
Improve section consistency
Reduce rework
Save time and consumables
Maintain reliable frozen section results
If section quality has declined and adjustments aren’t helping, the anti-roll plate is often the first place to look.
Histology embedding centers play a critical role in modern histopathology laboratories. They serve as the central workstation where tissue specimens are prepared for microscopic examination, enabling accurate diagnosis, research, and clinical decision-making.
The embedding process involves carefully positioning tissue samples into a supportive medium—most commonly paraffin wax—to allow for precise sectioning using a microtome. This process requires a high level of technical precision, proper temperature control, and skilled handling to preserve tissue structure and integrity.
Because diagnostic accuracy depends heavily on the quality of tissue preparation, histology embedding centers are among the most important components of the tissue processing workflow. Even small errors during embedding can impact slide quality, potentially affecting diagnostic interpretation and research outcomes.
Why Histology Embedding Centers Are Essential in Tissue Processing
Histology embedding centers ensure that biological tissues are properly stabilized and prepared for thin sectioning. This preparation allows pathologists and researchers to examine cellular structures clearly under a microscope.
Embedding occurs after fixation and dehydration, which preserve and prepare tissue samples for long-term analysis. The embedding medium surrounds the tissue, providing structural support so thin, uniform sections can be cut without distortion.
Key functions of histology embedding centers include:
Stabilizing tissue samples for microtome sectioning
Maintaining optimal embedding medium temperature
Allowing precise orientation of tissue structures
Ensuring consistent specimen preparation
Supporting efficient laboratory workflows
Without proper embedding, tissue samples may become distorted, incomplete, or unsuitable for accurate microscopic examination. Embedding centers provide the controlled environment needed to ensure reliable diagnostic and research results.
How the Tissue Embedding Process Works
The tissue embedding process begins after fixation and dehydration have prepared the specimen. At the embedding center, technicians place the tissue into a mold and surround it with a molten embedding medium, typically paraffin wax.
Once positioned correctly, the medium is cooled and solidified, creating a stable block that can be sectioned into extremely thin slices for microscopic analysis. Proper orientation during this step is essential to ensure diagnostically relevant structures are visible.
Key steps in the embedding process include:
Selecting the appropriate embedding medium
Positioning tissue in the correct anatomical orientation
Maintaining proper temperature for the embedding medium
Cooling and solidifying the embedded tissue block
Preparing the block for microtome sectioning
Paraffin wax remains the most commonly used embedding medium due to its stability, ease of use, and compatibility with standard histological procedures. However, alternative media may be used for specialized research applications.
Common Challenges in Histology Tissue Embedding
Despite advancements in histology equipment and workflow automation, tissue embedding presents several challenges that can impact slide quality and diagnostic reliability. Understanding these challenges is essential for maintaining consistent laboratory performance.
Most common tissue embedding challenges include:
Tissue orientation errors – Improper positioning can obscure important anatomical structures
Embedding medium selection – Different tissues require specific media for optimal results
Temperature inconsistencies – Improper temperatures can affect infiltration and block integrity
Equipment malfunctions – System failures can disrupt laboratory workflows
One of the most critical challenges is maintaining correct tissue orientation. Incorrect alignment can prevent important cellular features from appearing in tissue sections, potentially affecting diagnostic accuracy.
Temperature control is equally important. Embedding centers must maintain precise temperatures to ensure proper infiltration of the embedding medium. If temperatures fluctuate, tissue blocks may develop structural weaknesses, making sectioning difficult.
Equipment reliability also plays a major role in laboratory efficiency. Malfunctions can delay processing, increase workload, and affect overall laboratory productivity. Regular maintenance and proper training help minimize these risks.
Quality Control and Best Practices in Histology Embedding
Maintaining high-quality embedding standards requires a combination of proper equipment, technician training, and standardized laboratory procedures. Consistency in technique ensures reliable diagnostic outcomes and reduces the risk of errors.
Best practices for histology embedding centers include:
Maintaining proper embedding medium temperature
Ensuring correct tissue orientation
Performing regular equipment maintenance
Following standardized laboratory protocols
Providing ongoing technician training
These best practices help ensure consistent tissue preparation, improve workflow efficiency, and support accurate microscopic analysis.
The Importance of Proper Tissue Orientation and Embedding Medium Selection
Proper tissue orientation is one of the most critical determinants of histological slide quality. The positioning and alignment of the tissue within the embedding medium directly influence which anatomical structures are visible during microscopic examination. Even minor orientation errors can obscure diagnostically important features, potentially affecting clinical interpretation and research outcomes.
Embedding technicians must carefully align tissue samples based on anatomical landmarks and the intended diagnostic purpose. Proper orientation ensures that relevant cellular layers, margins, and structural relationships are preserved and clearly visible in the final sections.
Clinical Impact:
Incorrect tissue orientation can result in incomplete visualization of pathological features such as tumor margins, epithelial layers, or structural abnormalities. This may require re-embedding or reprocessing, delaying diagnosis and increasing laboratory workload.
Selecting the Appropriate Embedding Medium
Equally important is the selection of the proper embedding medium. The embedding medium provides mechanical support to the tissue, allowing thin, uniform sections to be cut without distortion or fragmentation. The physical properties of the medium directly affect sectioning performance, structural preservation, and slide clarity.
Paraffin wax remains the most widely used embedding medium due to its stability, ease of handling, and compatibility with standard histological staining protocols. It provides an ideal balance between firmness and flexibility, enabling consistent sectioning while preserving delicate cellular structures.
Key factors influenced by embedding medium selection:
Sectioning quality and structural integrity
Tissue preservation and stability
Microscopic visualization clarity
Compatibility with staining techniques
Long-term specimen preservation
Certain specialized tissues or research applications may require alternative embedding media. These alternatives may provide improved structural support or compatibility with advanced histological or molecular techniques.
Ultimately, the combination of precise tissue orientation and appropriate medium selection ensures optimal histological slide quality. Careful attention during the embedding stage preserves diagnostic features and supports accurate, reliable microscopic analysis.
Automation and Efficiency in Modern Histology Embedding Centers
Automation has significantly transformed histology embedding workflows, improving both efficiency and consistency. Modern embedding centers integrate precision temperature control, ergonomic design, and workflow optimization to support high-throughput laboratory environments.
Advanced embedding systems allow technicians to perform embedding tasks with greater precision and reduced physical strain. By maintaining consistent operating conditions, these systems help ensure uniform specimen quality across large volumes of tissue samples.
Key advantages of modern automated embedding centers:
Improved consistency and reproducibility across samples
Precise temperature regulation for optimal paraffin handling
Enhanced workflow efficiency and reduced turnaround times
Reduced technician fatigue through ergonomic workstation design
Increased laboratory throughput without compromising quality
Automation also enhances quality control by minimizing variability between operators. Consistent embedding conditions help ensure uniform block quality, which directly improves sectioning performance and microscopic visualization.
For high-volume laboratories, improved efficiency translates directly into faster diagnostic turnaround times. This is particularly important in clinical environments where timely diagnosis is critical for patient care and treatment planning.
Operational Advantage:
Modern embedding centers improve laboratory productivity by allowing technicians to process more samples efficiently while maintaining consistent quality standards. This balance of speed and precision is essential for modern histopathology workflows.
As histology laboratories continue to evolve, advanced embedding centers play an increasingly important role in supporting accurate diagnostics, efficient workflows, and high-quality tissue preparation.
Maintaining Cleanliness and Organization in Histology Embedding Centers
Maintaining a clean and well-organized embedding workstation is essential for ensuring accurate histological results and efficient laboratory operations. Histology embedding centers handle delicate tissue specimens that must remain uncontaminated and properly identified throughout the preparation process. Even minor lapses in cleanliness or organization can compromise specimen integrity and diagnostic reliability.
A structured workspace allows technicians to focus on precise tissue handling, reducing the risk of misidentification, sample damage, or procedural errors. Clear organization of tools, molds, cassettes, and embedding media ensures smooth workflow continuity and supports consistent specimen preparation.
Critical Risk: Cross-Contamination
Cross-contamination between specimens can introduce foreign cellular material into tissue sections, potentially leading to diagnostic inaccuracies. Strict adherence to cleaning protocols and careful handling procedures is essential to prevent contamination and preserve specimen purity.
Essential Cleanliness and Organization Practices
Regular cleaning of embedding surfaces and tools
Proper labeling and identification of all tissue samples
Immediate removal of paraffin residue and debris
Maintaining clearly designated work zones
Proper storage and handling of embedding molds and media
Following laboratory hygiene and safety protocols
Consistent cleaning prevents buildup of paraffin, tissue fragments, and debris that may interfere with specimen preparation. Clear labeling systems also reduce the risk of specimen misidentification, ensuring accurate patient diagnosis and research validity.
By maintaining a clean and organized embedding center, laboratories improve operational efficiency, reduce error rates, and ensure the highest standards of histological specimen preparation.
Troubleshooting and Maintenance of Histology Embedding Equipment
Histology embedding centers rely on precise temperature control, mechanical reliability, and consistent operating conditions to produce high-quality tissue blocks. Equipment malfunctions or operational inconsistencies can disrupt laboratory workflows and negatively impact specimen preparation.
Early identification and resolution of equipment issues are essential for minimizing downtime and maintaining diagnostic workflow continuity. Technicians must understand common equipment problems and follow established troubleshooting procedures to ensure consistent performance.
Common embedding center issues include:
Inconsistent paraffin temperature regulation
Heating element performance degradation
Mechanical component wear or failure
Control panel or electrical system malfunctions
Uneven paraffin dispensing or mold heating
Temperature stability is particularly critical, as improper paraffin temperature can affect tissue infiltration, block formation, and sectioning quality. Consistent thermal control ensures proper embedding medium performance and reliable specimen preparation.
Preventive Maintenance Best Practices
Routine inspection of temperature control systems
Verification of heating element performance
Calibration of timers and control systems
Regular cleaning of paraffin reservoirs and dispensing areas
Inspection of electrical and mechanical components
Following manufacturer-recommended maintenance schedules
Preventive maintenance not only extends the lifespan of embedding equipment but also ensures consistent operational performance. Regular inspection and calibration help maintain precise temperature regulation and mechanical stability.
Operational Impact:
Well-maintained embedding equipment ensures consistent specimen quality, reduces workflow interruptions, and supports accurate diagnostic outcomes. Proactive equipment care is essential for maintaining reliable laboratory performance.
By implementing proactive troubleshooting and maintenance strategies, histology laboratories can ensure continuous operation, improve workflow efficiency, and maintain the highest standards of tissue preparation.
Training and Skill Development for Histology Embedding Technicians
The effectiveness of a histology embedding center depends not only on equipment quality but also on the skill and expertise of the technicians operating it. Proper training ensures that tissue specimens are handled with precision, correctly oriented, and embedded under optimal conditions to preserve diagnostic integrity.
Embedding technicians play a critical role in the histopathology workflow. Their ability to consistently produce high-quality tissue blocks directly affects sectioning performance, slide clarity, and diagnostic accuracy. Even with advanced equipment, technician skill remains one of the most important factors influencing overall laboratory outcomes.
Clinical Significance:
Proper technician training reduces the risk of embedding errors, preserves critical tissue structures, and ensures reliable diagnostic interpretation. Skilled technicians help maintain consistency, efficiency, and quality throughout the histological preparation process.
Core Skills Required for Histology Embedding
Accurate tissue orientation and positioning
Proper handling of embedding media and molds
Understanding tissue structure and anatomical features
Maintaining precise temperature control
Following laboratory protocols and quality standards
Troubleshooting embedding and equipment issues
Continuous education is essential as histology technologies evolve. Technicians benefit from attending professional workshops, manufacturer training programs, and continuing education seminars. These opportunities provide exposure to new equipment, improved embedding techniques, and updated laboratory standards.
Investing in technician training promotes consistency, reduces errors, and strengthens overall laboratory performance. A well-trained team ensures reliable tissue preparation and supports accurate, timely diagnostic results.
The Future of Tissue Embedding and Histology Technology
The field of tissue embedding continues to evolve rapidly, driven by technological advancements and the increasing demands of modern pathology. Emerging innovations are improving embedding precision, workflow efficiency, and diagnostic capabilities across clinical and research laboratories.
Advanced embedding systems now incorporate digital controls, enhanced thermal regulation, and ergonomic workstation designs that improve consistency and operator efficiency. These improvements allow laboratories to process higher volumes of tissue samples while maintaining superior quality standards.
Emerging Innovation: Digital Pathology Integration
Integration with digital pathology systems allows laboratories to track specimens, improve workflow management, and enhance diagnostic accuracy. Digital technologies support faster analysis and improve collaboration between laboratory professionals and pathologists.
Key Emerging Trends in Tissue Embedding Technology
Advancements in automated embedding systems
Integration with digital pathology and laboratory information systems
Improved temperature control and thermal stability technologies
Development of advanced embedding media and materials
Expansion of 3D tissue modeling and bioprinting technologies
Enhanced ergonomic workstation design for technician efficiency
Technologies such as 3D tissue modeling and bioprinting are expanding research capabilities, allowing scientists to study tissue structures in greater detail. These advancements provide new opportunities for medical research, drug development, and diagnostic innovation.
As histopathology continues to advance, embedding centers must adopt modern technologies to remain efficient and competitive. Laboratories that invest in advanced embedding systems, technician training, and workflow optimization will be best positioned to meet the growing demands of modern diagnostic medicine.
Quality Control and Standard Operating Procedures in Histology Embedding Centers
Quality control is a fundamental component of histology embedding center operations. Consistent and reliable tissue preparation is essential for producing accurate histological slides that support clinical diagnosis, research, and treatment planning. Even small variations in embedding technique, temperature control, or tissue handling can affect specimen quality and diagnostic interpretation.
Embedding centers must implement structured quality control protocols to ensure consistent performance across all specimens. These protocols help minimize variability, maintain laboratory efficiency, and ensure the highest standards of tissue preparation.
Standard Operating Procedures (SOPs) Provide Critical Consistency
Standard Operating Procedures establish clear guidelines for each step of the embedding process, including tissue orientation, temperature management, equipment operation, and specimen handling. These protocols ensure consistency across technicians, shifts, and laboratory workflows.
Core Quality Control Practices in Embedding Centers
Following established standard operating procedures for embedding workflows
Documenting procedures and maintaining specimen traceability
Conducting routine quality assurance reviews
Regular audits and performance evaluations allow laboratories to identify inefficiencies, correct procedural inconsistencies, and improve workflow reliability. Continuous monitoring ensures embedding centers maintain optimal operating conditions and consistent specimen quality.
Diagnostic Impact:
Strong quality control protocols ensure that tissue samples are embedded consistently, allowing pathologists to examine cellular structures clearly and make accurate diagnostic decisions. Reliable embedding processes directly support patient care and clinical outcomes.
By maintaining rigorous quality standards and adhering to established protocols, histology embedding centers ensure reliable performance, accurate diagnostics, and efficient laboratory operations.
Conclusion: The Critical Role of Embedding Centers in Modern Histopathology
Histology embedding centers are a cornerstone of histopathology laboratories, providing the controlled environment necessary for precise tissue preparation and microscopic examination. The accuracy of diagnostic results and the reliability of research findings depend heavily on proper embedding techniques, equipment performance, and technician expertise.
High-quality embedding centers support consistent tissue preparation, enabling pathologists to evaluate cellular structures with clarity and confidence. Proper embedding ensures that critical anatomical features are preserved, allowing accurate diagnoses and supporting effective treatment planning.
As histology technologies continue to advance, embedding centers must evolve alongside them. The adoption of modern equipment, automation, and digital integration improves workflow efficiency and enhances diagnostic capabilities. Laboratories that invest in advanced embedding technologies and technician training are better equipped to meet the demands of modern healthcare and scientific research.
Long-Term Impact on Clinical Medicine and Research
Embedding centers play a vital role in advancing diagnostic medicine, supporting medical research, and improving patient outcomes. Their precision and reliability contribute directly to the development of new therapies, improved diagnostic techniques, and advancements in personalized medicine.
By maintaining high operational standards, adopting modern technologies, and prioritizing quality control, histology embedding centers will continue to serve as an essential foundation for accurate diagnosis, medical innovation, and laboratory excellence.
Additional Resources
References
The following authoritative resources provide additional technical guidance and clinical information related to histology embedding, tissue processing, and laboratory best practices:
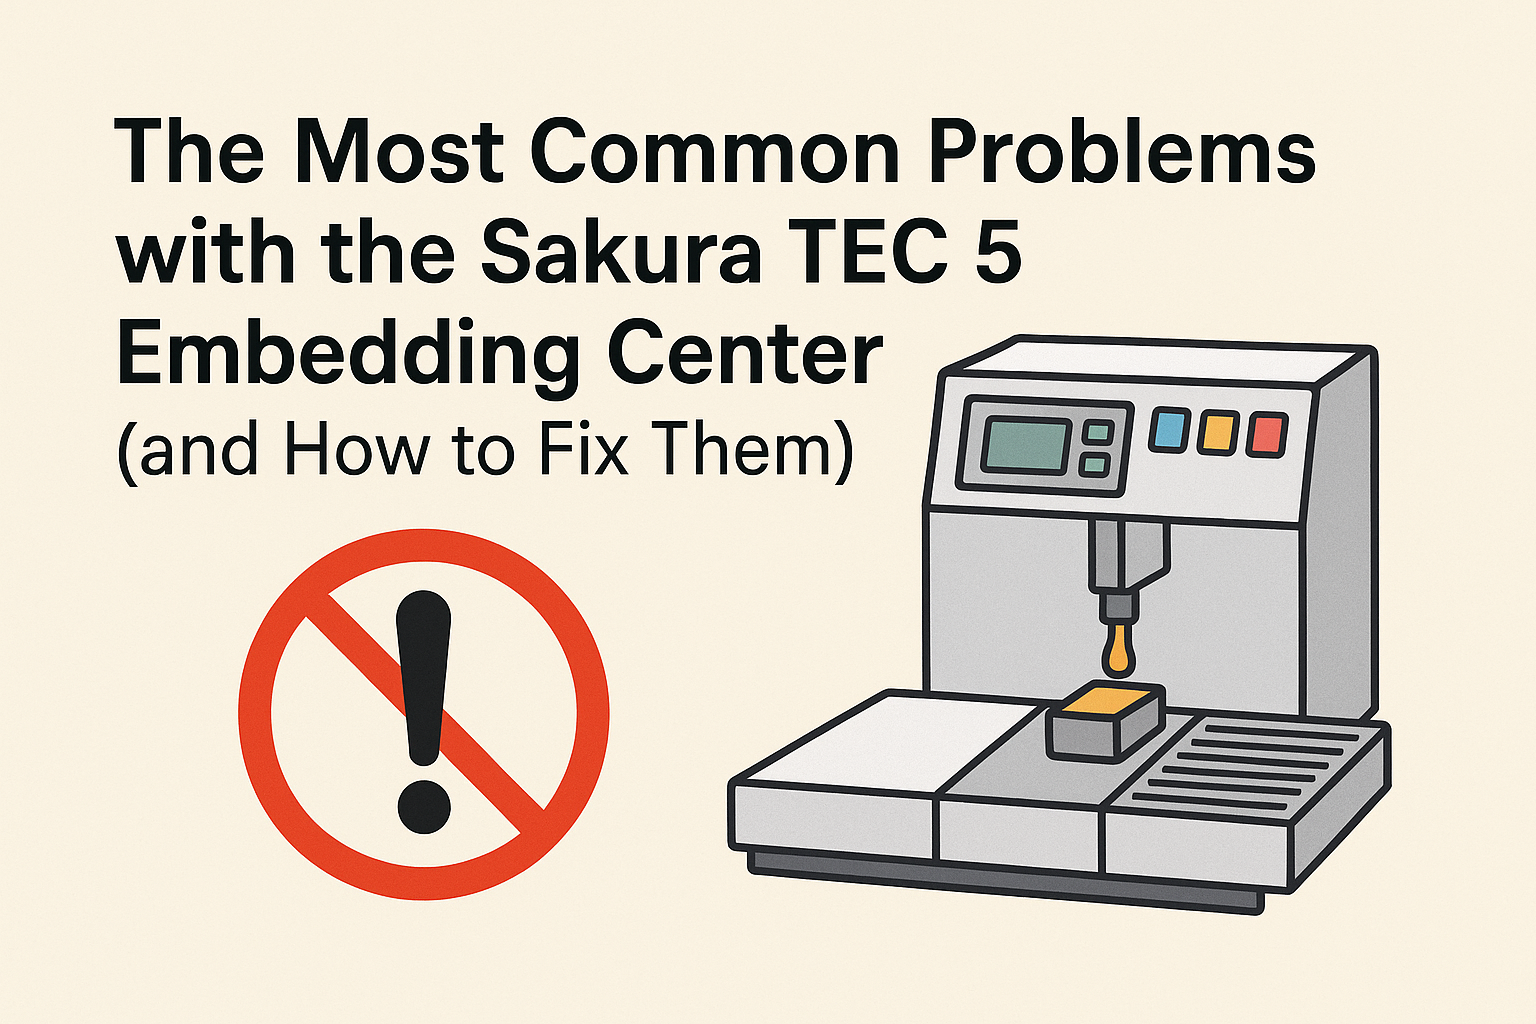
The Sakura TEC 5 Embedding Center is a trusted piece of histology lab equipment used to embed tissue specimens in paraffin before sectioning. Like any lab instrument, it requires proper care and maintenance to perform reliably day after day. When things go wrong, however, a few issues tend to appear more often than others.
To help labs troubleshoot quickly, we spoke with Daniel Silva, a biomedical equipment technician, about the most common problems he sees with the Sakura TEC 5—and how to fix them.
1. The Cold Plate Stops Cooling
Symptom: The cold plate no longer cools or doesn’t reach the expected low temperature.
Most Likely Causes:
Failed cooling fan: A small fan on the back of the unit moves air across the thermoelectric (Peltier) cooler. When that fan fails, there’s no airflow, and the plate can’t dissipate heat.
Leak or blockage in paraffin lines: Paraffin leaks can interfere with airflow or heat transfer inside the system.
Fix: Check the fan first—if it’s not spinning, replace it. The TEC 5 uses a Peltier cooling system rather than a refrigerant (no Freon), so airflow is critical. If the fan is functional, inspect the paraffin lines for leaks or buildup that could be disrupting cooling.
2. Line 1 Won’t Heat or Dispense Paraffin
Symptom: Everything else heats properly, but Line 1 stays cold and will not dispense paraffin.
Most Likely Cause: A failed heating element in Line 1. Each paraffin line has its own dedicated heating element, and Line 1 is statistically the one that fails most often.
Fix: Replace the heating element for that specific line. Because each line is independently wired, one can fail without affecting the others. A technician should verify voltage and continuity before replacement to confirm the fault.
3. The Valve Is Stuck or Clogged (No Dispensing or Continuous Flow)
Symptom:
The system heats normally, but nothing dispenses.
Or, the valve opens and won’t close, allowing paraffin to flow uncontrollably.
Most Likely Causes:
Dirty or reused paraffin: Recycled wax can carry debris that clogs or gums up the valve.
Contaminated paraffin buildup: Over time, unfiltered paraffin can solidify inside the valve mechanism.
Mechanical valve failure: Less common, but possible after heavy use.
Fix: Always use clean, fresh paraffin—never re-melt used wax. If clogging has already occurred, a technician will need to flush the lines and clean or replace the valve. This is not a user-serviceable task, as it requires specialized tools and heating procedures.
4. One Side of the Workstation Isn’t Heating
Symptom: Either the left or right working area remains cold while the opposite side heats correctly.
Most Likely Causes:
A blown fuse for that side’s heating circuit.
A failed heating mat or element under the work surface.
Fix: Each side of the TEC 5 has its own fuse and heating element. Check the fuse first—it’s located inline with the heating circuit. If the fuse is intact, the heating element itself may have failed and should be replaced. Both sides use the same design, so failure can occur on either side equally.
Preventive Tips for the Sakura TEC 5
Use only clean, laboratory-grade paraffin. Avoid reusing wax that’s been exposed to debris or tissue.
Keep airflow clear. Dust and wax buildup around the rear cooling fan can quickly cause overheating and cold-plate failure.
Schedule routine maintenance. Have a biomedical technician inspect fuses, fans, and heating elements annually.
Flush lines when contamination is suspected. Early cleaning prevents clogs that can lead to more costly valve replacements.
Final Thoughts
The Sakura TEC 5 Embedding Center is generally dependable, but like any high-use histology instrument, it benefits from consistent maintenance and a clean workflow. Most issues—from failed fans to clogged valves—can be prevented with regular inspection and proper paraffin handling. Keeping these basics in mind will minimize downtime and keep your lab running smoothly.
Frequently Asked Questions (FAQ)
1. What does the Sakura TEC 5 Embedding Center do?
The Sakura TEC 5 is a paraffin embedding system used in histology and pathology labs. It allows technicians to embed biological tissue samples in paraffin wax before microtomy, ensuring stable sections for microscopic analysis.
2. Why is my Sakura TEC 5 cold plate not cooling?
If the cold plate stops cooling, it’s most often due to a failed rear cooling fan or a paraffin leak that interferes with airflow. The Sakura TEC 5 uses a Peltier (thermoelectric) cooling system, so airflow is essential. Replacing the fan or fixing leaks usually resolves the issue.
3. What should I do if one of the paraffin lines isn’t dispensing?
If one of the lines—especially Line 1—doesn’t heat or dispense, the heating element for that line has likely failed. Each line has its own heating circuit, so replacing that individual element typically restores function.
4. How do I prevent clogging in the paraffin lines?
Avoid reusing paraffin, as it can introduce contaminants and debris that solidify inside the valve. Always use clean, fresh paraffin and schedule periodic professional maintenance to keep lines clear.
5. Can users flush the lines themselves?
No. Flushing paraffin lines requires specific tools and heat-control procedures. It should be performed by a qualified biomedical technician to avoid damage to the system or safety risks.
6. What maintenance should I perform regularly?
Wipe away excess wax daily.
Keep the rear fan area dust-free.
Use only clean paraffin.
Have a technician inspect fuses, fans, and heating elements annually.
Regular care prevents most of the common TEC 5 issues before they start.
Professional Service & Support for Sakura TEC 5 Embedding Centers
Even with the best care, equipment like the Sakura TEC 5 Embedding Center sometimes needs professional attention. That’s where our team comes in.
At Amtech Medical, we don’t just provide histology and dermatology equipment—we also offer diagnostic and repair services for embedding centers, cryostats, and other lab instruments. Whether your TEC 5 needs a fan replacement, heating element repair, or a full system inspection, our technicians can help you get back up and running quickly.
Our service options include:
On-site or depot repair for embedding centers
Preventive maintenance programs for lab equipment
Replacement parts for Sakura, Leica, and Thermo Fisher systems
Technical support and troubleshooting
We specialize in fast turnaround times and cost-effective repairs—so your lab can focus on what matters most: patient care and accuracy.
Midmark procedure lights are widely used across medical offices, dermatology clinics, outpatient surgical centers, and examination rooms. These lights provide the bright, focused illumination required for precision procedures, ensuring clinicians have clear visibility during examinations, biopsies, and surgical work. Available in both mobile and ceiling-mounted configurations, Midmark lights are known for their durability, smooth positioning, and dependable performance.
Over time, Midmark has produced multiple generations of procedure lights. Two of the most commonly encountered models today are the halogen-based Midmark 355 and the newer LED-based Midmark 255. While both systems are designed for long-term reliability, their internal components and failure patterns differ significantly.
Common Midmark Procedure Light Models:
Midmark 355: Traditional halogen-bulb procedure light with transformer-driven illumination
Midmark 255: Modern LED-based procedure light with longer lifespan and reduced maintenance requirements
Although these lights are engineered for longevity, electrical components, bulbs, and LED boards eventually wear out. Understanding the most common Midmark procedure light problems helps clinics troubleshoot quickly, reduce downtime, and determine when professional service is required.
Midmark 355 Light Will Not Turn On
One of the most frequently reported issues with the Midmark 355 procedure light is complete loss of illumination. Because this model relies on a halogen bulb and transformer system, multiple components must function correctly for proper operation.
Common symptoms include:
Light does not turn on when power switch is activated
Bulb intermittently works, then fails again
No visible illumination despite confirmed power connection
Most Common Causes
Burned-out halogen bulb
Incorrect bulb type causing premature failure
Transformer supplying excessive voltage
Pinched or damaged internal wiring within mounting arm
Recommended Fix and Best Practices
Replace the halogen bulb using gloves or lint-free cloth
Verify correct bulb model and voltage specifications
Inspect transformer output if bulbs fail repeatedly
Check wiring integrity if light fails intermittently or only in certain positions
If wiring damage or transformer issues are suspected, professional service may be required to safely diagnose and repair internal electrical components.
Midmark 255 LED Board Failure
The Midmark 255 uses an integrated LED illumination system instead of a traditional halogen bulb. While LEDs provide significantly longer lifespan and improved efficiency, failure typically occurs at the board level rather than a single replaceable bulb.
Common symptoms include:
Light fails completely with no illumination
No response despite confirmed electrical power
Sudden loss of function without gradual dimming
Underlying Causes
Failure of LED driver board
Electrical surges damaging sensitive LED circuitry
Long-term electrical component wear
Resolution
The most effective solution is replacement of the LED board assembly. Installing surge protection can help extend system lifespan and prevent future failures caused by electrical fluctuations.
Professional Midmark Procedure Light Repair Available
Fast response • Nationwide service • Experienced medical equipment technicians
Midmark 355 Bulb Cracking or Overheating
Premature bulb cracking or overheating is another common issue with halogen-based Midmark 355 lights. This problem is often related to improper bulb handling during installation rather than internal system failure.
Root Cause
Halogen bulbs are extremely sensitive to contamination. Oils from skin create microscopic hot spots on the glass surface. When the bulb heats during operation, these areas overheat and cause the glass to crack prematurely.
Recommended Prevention
Always wear gloves when installing halogen bulbs
Use lint-free cloth if gloves are unavailable
Ensure power is turned off during bulb replacement
Midmark Procedure Light Sways or Will Not Hold Position
Proper positioning stability is essential for any procedure light. When a Midmark light begins drifting, swaying, or failing to hold its position, it can interfere with clinical workflows and compromise procedural visibility. This issue most commonly affects mobile stand-mounted units or articulated ceiling-mounted systems.
Common symptoms include:
Light slowly drifts downward after positioning
Light feels loose or unstable at pivot joints
Difficulty maintaining stable illumination during procedures
Light arm moves too freely or lacks resistance
Underlying Cause: Counterweight Imbalance
Midmark procedure lights rely on a precision counterweight system to maintain balance throughout the full range of motion. Over time, normal wear, improper adjustment, or component fatigue can cause the counterweight system to lose alignment. When this occurs, the articulated arm cannot properly counterbalance the weight of the light head.
Recommended Resolution
Adjust counterweight positioning to restore balance
Inspect pivot joints for excessive wear
Replace worn counterweight or balance components if necessary
Verify proper installation and mounting alignment
If adjustments do not resolve the issue, professional service may be required to repair or replace internal balance components.
Understanding Long-Term Reliability of Midmark Procedure Lights
Midmark procedure lights are widely recognized for their durability and long service life. The Midmark 355 halogen model typically requires more frequent maintenance due to bulb replacement needs, while the Midmark 255 LED model offers extended lifespan with fewer service requirements.
Most failures occur due to normal component aging, electrical wear, or environmental factors such as electrical surges or improper handling. Fortunately, these issues are generally straightforward to repair, and properly maintained Midmark lights can remain operational for many years.
Typical component lifespan expectations:
Halogen bulbs: Require periodic replacement depending on usage
LED boards: Longer lifespan but require replacement upon failure
Counterweight and pivot systems: Long-lasting with proper adjustment
Electrical wiring and transformers: Extremely durable when properly installed
Routine maintenance and proper handling significantly extend the lifespan and reliability of Midmark procedure lights.
Preventive Maintenance Best Practices for Midmark Lights
Implementing preventive maintenance practices helps minimize downtime, extend component lifespan, and ensure reliable illumination performance. Most Midmark light issues can be prevented through proper handling, electrical protection, and routine inspection.
Recommended preventive maintenance practices:
Use gloves when installing halogen bulbs to prevent premature failure
Install surge protection to protect LED boards and electrical components
Ensure proper installation to prevent wiring damage
Inspect counterweight balance periodically
Keep replacement bulbs available for halogen systems
Schedule routine professional equipment inspections
Preventive care helps avoid unexpected failures and ensures consistent clinical performance.
Final Thoughts on Midmark Procedure Light Reliability and Repair
Midmark procedure lights are designed to provide dependable illumination in demanding clinical environments. Their simple, robust design allows most issues to be resolved quickly, whether through bulb replacement, LED board repair, electrical troubleshooting, or counterweight adjustment.
By identifying and addressing minor issues early, clinics can prevent larger failures and maintain uninterrupted operation. Routine maintenance, proper installation, and electrical protection play a critical role in maximizing system lifespan.
When professional repair is required, prompt service ensures safe, reliable operation and minimizes downtime.
Need Midmark Procedure Light Repair or Maintenance?
The Candela Vbeam Perfecta is one of the most trusted pulsed dye lasers in dermatology. Designed primarily for vascular treatments such as veins, rosacea, and scars, it also has off-label uses for warts and other skin conditions.
What makes the Vbeam unique is its 595 nm wavelength. Sitting in the yellow-orange range of visible light, this wavelength is absorbed especially well by blue vessels, making it highly effective for vascular work.
Key Technical Difference: Dye-Based Laser System
Unlike solid-state lasers, the Vbeam is a dye-based laser. This architecture provides exceptional vascular targeting performance, but also introduces unique maintenance requirements and long-term service considerations.
Because of this design, the Vbeam has specific quirks around routine maintenance, optical transmission, and dye lifespan.
Here are the most common problems and error codes seen with the Candela Vbeam Perfecta, what they mean, and how to address them.
Fault 15 – Transmission Error
If you’ve ever seen your Vbeam throw a Fault 15 message during calibration, you know how disruptive it can be. Treatments stop, calibration fails, and patient schedules are affected.
This fault indicates a transmission loss between the laser head and the handpiece. In simple terms, the energy generated inside the system is not reaching the treatment area efficiently.
When the system detects approximately 25–30% transmission loss, it shuts down operation to prevent ineffective or unsafe treatment delivery.
Common clinical symptoms include:
Calibration failure
Weak or inconsistent output
Noticeable dead spots during treatment
Reduced treatment effectiveness
Primary Causes
Damaged or degraded fiber optic line
Worn or contaminated slider lenses
Debris shield contamination or wear
Recommended Fix and Best Practices
Daily debris shield cleaning with alcohol is the simplest and most effective preventive measure.
If Fault 15 appears, try switching handpiece sliders. For example, move from a 7 mm slider to a 5 mm or 10 mm slider.
If the fault resolves, the original slider likely needs repair or replacement. If the fault persists across multiple sliders, fiber damage may require professional service.
Fault 6 – Calibration Fault
Calibration is a built-in safety system that verifies energy output accuracy whenever settings are changed.
When the system cannot achieve the requested energy level, it generates Fault 6 and prevents operation.
Typical signs include:
Error during calibration
Failure to reach selected energy levels
No improvement after cleaning or slider changes
Underlying Cause
Unlike Fault 15, Fault 6 typically indicates an internal energy generation issue rather than a transmission problem.
Dye cartridge approaching end-of-life
Internal mirror degradation
Laser optics efficiency loss
Solution
Fault 6 requires professional service to restore proper laser generation and calibration accuracy.
Professional Candela Vbeam Perfecta Service Available
Fast response • Nationwide service • Experienced laser technicians
Fault 12 – Energy Out of Range / Energy Imbalance
If you’ve ever seen your Vbeam display an Energy Out of Range or imbalance warning, it is usually an early indicator of dye depletion. This fault appears when the laser can no longer maintain consistent energy output.
How It Appears in Clinical Use
Energy output becomes inconsistent
Treatments appear weaker than expected
Output performance fluctuates
The system eventually displays Fault 12
Why This Happens
The Vbeam generates laser output using a series of precisely timed sub-pulses. These pulses must remain balanced to deliver proper treatment energy.
As the dye begins to break down, energy generation becomes uneven. The system detects this imbalance and triggers Fault 12 before performance degrades further.
Resolution
Fault 12 almost always indicates that the dye cartridge has reached the end of its usable lifespan and requires replacement.
Once the dye kit is replaced and the system is recalibrated, energy consistency and treatment performance return to normal.
Professional Candela Vbeam Perfecta Service Available
Fast response • Nationwide service • Experienced laser technicians
Understanding Dye Lifespan and Ownership Expectations
The Candela Vbeam Perfecta is one of the most reliable dermatology lasers available, but its dye-based architecture means the dye has a finite lifespan.
Most dye kits last approximately 40,000–50,000 pulses, with a manufacturer guarantee of around 20,000 shots or one year.
High-volume clinics may exhaust dye kits in months, while lower-volume clinics may reach expiration based on calendar time rather than shot count.
Preventive Maintenance Tips for Vbeam Perfecta
Clean debris shields daily
Replace shields proactively
Rotate handpiece sliders when needed
Track shot counts
Schedule annual preventive maintenance
Final Thoughts
The Candela Vbeam Perfecta remains one of the most versatile and effective vascular lasers in dermatology.
Understanding dye lifespan and fault codes such as Fault 6, 12, and 15 helps clinics minimize downtime and maintain optimal performance.
With proper preventive maintenance and timely service, the Vbeam Perfecta delivers reliable performance for many years.
Fast response • Nationwide service • Experienced laser technicians
References and Additional Resources
The following trusted clinical and manufacturer resources provide additional technical and medical information regarding pulsed dye lasers, Candela Vbeam systems, and laser safety.
Silverfox procedure chairs are widely used in dermatology clinics, aesthetic practices, and medical spas due to their versatility, patient comfort, and affordability. These chairs provide reliable positioning support for a wide range of treatments, from laser procedures to examinations and cosmetic treatments.
While Silverfox chairs are generally dependable, their high usage volume means certain mechanical and structural components experience wear over time. Understanding these common failure points allows clinics to troubleshoot problems quickly, minimize downtime, and extend equipment lifespan.
Technician Insight from Amtech Medical
We spoke with Amtech Medical field service technician Daniel Silva about the most common Silverfox chair failures seen in real-world clinical environments. These issues are consistent across many models and typically involve actuators, armrest assemblies, and cosmetic structural components.
This guide explains the most common Silverfox chair problems, how to identify them, and when professional service is required.
Actuator Failure: Chair Will Not Move or Adjust
Actuator failure is one of the most common issues affecting Silverfox chairs. Actuators are responsible for controlling movement functions such as height adjustment, backrest reclining, and footrest positioning. When an actuator fails, the affected section of the chair becomes completely unresponsive.
Common symptoms of actuator failure include:
Backrest does not recline or return upright
Footrest does not raise or lower
Chair height remains fixed and will not adjust
No motor sound, clicking, or movement when pressing the remote
Technical Cause:
In most cases, the actuator itself has failed rather than the control board. Failed actuators typically show no mechanical response when activated. Electrical wear, internal motor failure, and long-term usage are the most common contributing factors.
Recommended Resolution
Actuator replacement requires proper diagnosis to confirm whether the actuator or control system is at fault. Most actuator failures require professional service and component replacement.
Fast response • Nationwide service • Experienced equipment technicians
Broken or Loose Armrests
Armrest assemblies are one of the most frequent structural failure points on Silverfox chairs. Because patients often use armrests for support when getting on or off the chair, excessive force can damage internal mounting components.
Common symptoms include:
Armrest becomes loose or unstable
Armrest drops suddenly or will not hold position
Visible structural looseness or stripped mounting hardware
Armrest hangs or dangles freely
Technical Cause:
Silverfox armrests rely on mounting bolts and structural stops to maintain positioning. Excessive weight or repeated stress can strip threads or deform mounting points, resulting in loss of structural stability.
Depending on the severity, armrest repair may involve hardware replacement or full armrest assembly replacement.
Loose or Detached Plastic Covers
Silverfox chairs use protective plastic covers to conceal internal components and maintain a clean, professional appearance. These panels are typically secured using push-pin fasteners, which can loosen or fail over time.
Common signs include:
Plastic panels hanging or detached beneath the chair
Visible gaps in cosmetic trim or housing
Panels temporarily secured using tape
Loose or missing push-pin fasteners
Recommended Resolution:
Replace worn push-pin fasteners
Reattach loose plastic panels securely
Replace damaged plastic covers if necessary
While cosmetic issues do not typically affect chair functionality, maintaining structural integrity improves safety, durability, and professional appearance.
Footrest Extension Sensor Prevents Movement
Many Silverfox chairs include an extendable footrest designed to accommodate taller patients. This extension mechanism includes a built-in safety sensor that prevents footrest movement when the extension is not fully retracted. This safety feature protects internal mechanical components from damage during operation.
No mechanical noise or actuator movement from footrest
Technical Cause:
The safety interlock sensor prevents actuator movement when the extension is not fully seated. This protects the actuator system and mechanical linkage from stress or misalignment damage.
Recommended Resolution
Fully retract the footrest extension until seated properly
Verify the extension mechanism is properly aligned
Test footrest operation after re-seating extension
This issue is typically resolved without service once the extension is fully seated.
Upholstery Wear, Cracking, and Cosmetic Damage
Silverfox chairs experience upholstery wear over time, particularly in high-volume practices where chairs are used continuously throughout the day. While this does not affect mechanical functionality, it can impact patient perception and overall clinic appearance.
Common signs of upholstery wear include:
Cracking or peeling on seat cushions or backrests
Discoloration or fading of upholstery surfaces
Tears forming near seams or high-stress areas
Visible cosmetic deterioration with continued usage
Resolution Options:
Replace individual upholstery panels
Install replacement upholstery kits
Perform professional reupholstery services
Replace chair if structural wear is extensive
Maintaining upholstery helps preserve both patient comfort and professional presentation.
Understanding Long-Term Reliability of Silverfox Chairs
Silverfox chairs are designed to provide affordable and practical positioning solutions for dermatology and aesthetic clinics. Their widespread use reflects their reliability, but certain components experience wear faster due to their lightweight construction and frequent use.
Most common long-term wear points include:
Actuator motor assemblies
Armrest mounting hardware
Plastic housing and cosmetic covers
Footrest extension sensors and linkage systems
Upholstery materials and protective coverings
These wear patterns are normal for frequently used clinical equipment and can be managed through routine maintenance and timely repairs.
Preventive Maintenance Best Practices for Silverfox Chairs
Routine preventive care significantly extends the lifespan of Silverfox chairs and reduces the likelihood of unexpected failures. Early detection of wear allows clinics to address issues before they affect operations.
Recommended preventive maintenance practices:
Avoid placing excessive weight on armrests
Inspect structural hardware regularly for looseness or wear
Replace worn push-pin fasteners as needed
Ensure footrest extensions are properly seated during use
Clean and maintain upholstery regularly
Schedule professional equipment inspections annually
Preventive maintenance reduces downtime, improves safety, and extends equipment service life.
Silverfox Chair Repair, Parts, and Service Support
Silverfox chairs provide dependable positioning and comfort for a wide range of treatments. While certain components experience wear over time, most issues can be resolved quickly through proper diagnosis and repair.
Understanding early warning signs and implementing preventive maintenance ensures reliable performance and minimizes disruption to your clinical workflow.
TabTabletop autoclaves are the backbone of sterilization for small medical offices, dermatology practices, dental clinics, and medspas. Compact yet powerful, they ensure instruments are sterilized safely, protecting both patients and providers.
But like any equipment, these autoclaves develop recurring issues — usually from daily wear, skipped maintenance, or environmental factors like poor water quality. The good news is that many of these problems can be diagnosed quickly, and in some cases, fixed without waiting on a service call.
Below we’ll walk through the most common autoclave problems, what causes them, and what to do next. Along the way, we’ll include real-world scenarios to show how these issues play out in the field.
1. Autoclave Won’t Power On
Imagine this: a dermatology clinic is getting ready for back-to-back procedures, but the autoclave won’t even light up. The front desk is panicking, because without sterilized instruments, the day’s schedule is on the line.
Common Causes:
Loose power cable or faulty outlet
Tripped circuit breaker or blown fuse
Faulty door switch (some autoclaves won’t power unless the door is fully closed)
Fix:
Confirm the outlet works by testing another device.
Inspect the fuse or breaker and replace/reset as needed.
Check that the door is latched tightly — on many tabletop units, an incomplete latch interrupts the power circuit.
If it still won’t start, the control board or wiring likely needs professional repair.
2. Chamber Won’t Pressurize
One of the most common calls we get is: “The cycle runs, but the autoclave never builds pressure.” In one case, a medspa reported hearing faint hissing during every cycle — sure enough, the door gasket had cracked, and steam was escaping instead of building pressure.
Causes:
Worn or cracked door gasket
Loose or unevenly latched door
Scale buildup around valves from using tap water instead of distilled
Leaky fittings or solenoid valves
Fix:
Replace door gaskets annually, or sooner if cracks or flattening appear.
Confirm the door closes evenly — sometimes hinges loosen over time.
Clean valves and fittings.
Always use distilled water only to prevent scale buildup.
3. Sterilization Cycle Won’t Complete
A dental practice once reported their autoclave was aborting halfway through every cycle. After inspection, we found the drain filter was clogged with cotton fibers from gauze packs. Airflow was restricted, steam couldn’t circulate, and cycles failed.
Causes:
Overloaded chamber (steam can’t circulate)
Drain filter clogged
Faulty temperature or pressure sensors
Heating element wearing out
Fix:
Load instruments loosely, allowing space for steam.
Clean the drain filter weekly — it’s small but critical.
If problems persist, sensors or heaters may require replacement.
4. Wet Packs After a Cycle
Few things frustrate staff more than opening the door to find wet, dripping packs. Not only is it unsafe (moisture can harbor microbes), but it means re-running the cycle — doubling sterilization time.
Causes:
Chamber overloaded
Improper wrapping material
Drain line partially clogged
Door gasket leaking steam at the wrong time
Fix:
Reduce load size and leave room between packs.
Only use wraps designed for autoclaves.
Inspect drain lines and clean if blocked.
Replace or lubricate the door gasket if leaking.
5. Strange Noises or Leaks
Another medspa complained about “knocking” sounds during cycles. After inspection, we found scale buildup inside the steam lines — mineral deposits from using tap water. The fix was a thorough descaling and a reminder to always use distilled water.
Causes:
Solenoid valve beginning to fail
Loose or worn chamber gasket
Mineral buildup in chamber or tubing
Fix:
Replace worn seals and valves.
Perform regular descaling treatments (especially in hard-water areas).
Call for service if noises persist — they can indicate valve timing issues.
6. Error Codes or “Service Required”
Modern tabletop autoclaves have error codes for safety. These can be intimidating, but often they point directly to the issue.
For example, an error might indicate a temperature sensor failure — meaning the unit isn’t sure how hot it actually is. In one dermatology office, a persistent error code turned out to be nothing more than a faulty door switch, replaced in under 30 minutes.
Common Codes Indicate:
Sensor failure (temp/pressure)
Electrical heating fault
Board communication error
Door/lid not sealed properly
Fix:
Try a full power cycle.
Refer to the user manual for code meaning.
Some fixes are user-friendly (gaskets, switches), but persistent codes often need a technician.
Preventive Care to Avoid Most Problems
In almost every scenario above, the problem could have been prevented with basic care.
Use distilled water only — tap water = scale buildup.
Clean the drain filter weekly.
Check gaskets monthly and replace annually.
Avoid overloading to allow proper steam circulation.
Schedule yearly preventive maintenance to catch small issues before they shut you down.
Final Thoughts
Tabletop autoclaves are dependable workhorses, but they’re not invincible. From leaking gaskets to wet packs, most problems follow predictable patterns and can be solved with simple checks.
By knowing what to look for — and addressing issues early — you can keep your autoclave running smoothly, minimize downtime, and protect patient safety.
And when the fix goes beyond basic troubleshooting? That’s where professional technicians step in. Having a trusted service partner means peace of mind that your autoclave is always ready when you need it most.
Looking for a Replacement?
Sometimes, repairing an older tabletop autoclave just isn’t cost-effective. If the heating element, control board, or chamber itself is failing, the repair costs may approach the price of a new unit.
That’s where Amtech Medical’s refurbished autoclaves come in.
We stock a range of used, professionally reconditioned autoclaves that are:
Fully serviced and tested by our technicians
Backed by warranty for peace of mind
More affordable than new units — without sacrificing reliability
Available in multiple models and sizes to fit the needs of dermatology, dental, histology, and medspa practices
Choosing a refurbished autoclave from Amtech Medical gives you the confidence of a fully inspected and serviced machine at a fraction of the cost of new. It’s the perfect option for practices that need dependable sterilization without stretching their budget.
While some issues with tabletop autoclaves can be fixed in-house, others require a trained technician. Electrical failures, sensor replacements, valve timing issues, and control board repairs should always be handled by professionals to avoid bigger (and more expensive) problems down the line.
At Amtech Medical, we provide:
Nationwide Service Coverage – Our technicians travel to support practices across the U.S.
Preventive Maintenance Programs – Keep your autoclave reliable with scheduled inspections and cleanings.
Emergency Repairs – Fast turnaround when your sterilizer goes down unexpectedly.
Multi-Device Support – We service autoclaves alongside your other dermatology, lab, and general medical equipment.
Our goal is simple: minimize downtime and keep your practice running smoothly. With decades of experience across autoclaves, lasers, and diagnostic equipment, our team has the expertise to troubleshoot quickly and get your sterilizer back in operation.
Common Leica Cryostat Problems and How to Fix Them
Leica Biosystems is a German manufacturer globally recognized for producing high-quality histology equipment, microscopes, and laboratory imaging systems. Among their most respected products are Leica cryostats, which are widely considered the industry gold standard for frozen sectioning in histology and pathology laboratories.
Leica cryostats are known for their durability, precision engineering, and user-friendly design. Many laboratories rely on them for years of consistent performance, and both technicians and service engineers frequently praise their reliability. However, like any precision mechanical system, cryostats can develop issues over time due to wear, improper adjustment, or environmental factors.
Why Cryostat Performance Matters
Consistent cryostat performance is essential for producing high-quality frozen sections. Mechanical instability, improper temperature control, or blade holder issues can result in uneven sections, tissue damage, or diagnostic delays. Understanding common problems and their causes helps laboratories maintain reliable operation and avoid unnecessary downtime.
Below, we’ll cover the most common Leica cryostat problems, explain their likely causes, and provide practical troubleshooting steps to restore proper operation.
Inconsistent Cutting (Thick and Thin Sections)
One of the most common Leica cryostat issues is inconsistent section thickness. This often appears as alternating thick and thin sections, ridges, or chatter patterns in the tissue. These irregularities can interfere with accurate histological analysis and may require technicians to repeat sectioning, wasting valuable specimen material.
Common symptoms include:
Uneven section thickness
Alternating thick and thin bands in tissue sections
Visible ridges or chatter patterns
Reduced sectioning precision and diagnostic clarity
Likely Causes
Inconsistent sectioning is typically caused by instability within the blade holder assembly or improper blade positioning. Even minor looseness or misalignment can significantly impact cutting performance.
Most common mechanical causes include:
Loose locking levers on the blade holder
Blade holder not securely mounted to the microtome base
Misaligned front and rear pressure plates
Worn, weakened, or warped tension springs
Improper blade angle adjustment
Recommended Troubleshooting Steps
Check locking levers: Confirm all blade holder locking levers are fully tightened. Even slight movement can cause inconsistent cuts.
Inspect blade holder mounting: Ensure the blade holder is firmly seated on the microtome base without any play.
Verify pressure plate alignment: Front and rear pressure plates must apply even tension across the blade.
Examine tension springs: Replace worn or weakened springs that may reduce blade stability.
Adjust blade angle: Leica typically recommends blade angles between 5° and 10°. Adjust gradually until sectioning improves.
Fast response • Nationwide service • Leica cryostat specialists
If these adjustments do not resolve the issue, the problem may involve internal microtome components such as the cam system, bearings, or specimen advance mechanism. These components require professional inspection and repair.
Cryostat Defrosting During Active Lab Hours
Unexpected cryostat defrost cycles during working hours can disrupt laboratory workflow and delay specimen processing. This issue is usually related to incorrect defrost scheduling rather than mechanical failure.
Most Common Cause
Improper defrost timer configuration
Cryostats use scheduled defrost cycles to prevent ice buildup. If the defrost timer is set incorrectly, the system may enter defrost mode during active laboratory hours.
Recommended Solution
Verify the cryostat internal clock is accurate
Schedule defrost cycles during non-operational hours (typically midnight to early morning)
Ensure defrost timing aligns with laboratory workflow
If defrost cycles continue to occur at incorrect times despite proper scheduling, the defrost valve or control system may require professional service.
Object Head Not Advancing
If the cryostat object head fails to advance or retract properly, sectioning becomes impossible. This issue may present as unresponsive advance buttons, lack of movement when rotating the handwheel, or audible motor noise without actual movement.
Common symptoms include:
No response when pressing advance or retract buttons
Automatic advance feature not functioning
Motor noise without mechanical movement
Object head stuck in fixed position
Likely Causes
Common causes include:
Electronic failure such as motor malfunction or wiring issues
Ice buildup locking the micrometer advance mechanism
Mechanical obstruction within the micrometer drive system
Recommended Troubleshooting Steps
Perform a full defrost: Power off the cryostat, open the chamber window, and allow the unit to warm to room temperature for 24–48 hours to fully eliminate ice buildup.
Ensure complete dryness: Restart the system only after all internal condensation has evaporated.
Attempt manual advance: Set micrometer advance to maximum (50–60 microns) and rotate the handwheel to break minor ice obstructions.
Fast response • Nationwide service • Leica cryostat specialists
If the object head remains stuck after full defrosting, the micrometer drive system or motor assembly may require professional repair or replacement.
Specimen Splintering During Sectioning (Specimen Too Cold)
Specimen splintering occurs when frozen tissue becomes excessively brittle, causing sections to fracture or fragment during cutting. This is typically caused by chamber temperatures set below recommended operating levels.
Root Cause
Excessively low chamber temperature
Temperatures below Leica’s recommended range (typically around –23°C for Mohs applications) cause tissue to become brittle and prone to fragmentation during sectioning.
Recommended Solution
Warm the specimen slightly: Gentle warming using body heat or brief exposure to ambient air can improve sectioning consistency.
Adjust chamber temperature: Leica typically recommends –23°C for optimal Mohs sectioning performance.
Avoid excessive cooling: Lower temperatures may accelerate freezing but can significantly reduce section quality.
Maintaining proper chamber temperature ensures consistent section quality while preserving specimen integrity.
Specimen Mushing During Sectioning (Specimen Too Warm)
Specimen mushing occurs when tissue is insufficiently frozen, resulting in compression, distortion, or tearing during sectioning. This typically indicates inadequate specimen cooling or insufficient chamber temperature.
Root Causes
Insufficient freezing or chamber cooling
Specimen not fully frozen prior to sectioning
Chamber temperature above recommended range
Reduced refrigeration system performance
Recommended Solution
Use the heat extractor block: Apply for approximately 10 minutes prior to sectioning for uniform freezing.
Verify chamber temperature: Ensure chamber temperature is below –21°C before sectioning.
Allow adequate cooling time: Ensure specimens reach full equilibrium temperature.
Fast response • Nationwide service • Leica cryostat specialists
If the cryostat cannot maintain proper cooling despite adjustments, the refrigeration system, temperature sensors, or compressor may require professional service.
Cryostat Not Cooling Down
If a Leica cryostat fails to cool down properly, the chamber will remain warm and unusable for frozen sectioning. In some cases, the compressor may not engage at all, preventing the system from reaching its target temperature.
Common symptoms include:
Chamber temperature remains above set point
Compressor does not engage
No audible compressor operation
System unable to maintain cooling
Possible Causes and Troubleshooting
Several issues can prevent proper cooling, ranging from minor system errors to refrigeration component failure.
Error Codes and System Protection
Error codes such as E02, E20, E21, or E22 often indicate chamber moisture, temperature sensor issues, or system protection shutdown.
In many cases, simply acknowledging the error by pressing any button allows the system to reset and resume normal cooling operation.
Mechanical Causes Requiring Service
Potential refrigeration system failures include:
Compressor motor failure
Faulty evaporator or condenser fan
Refrigerant leak
Temperature sensor malfunction
Electrical control system failure
If the compressor does not engage after clearing error codes, the refrigeration system likely requires professional inspection and repair by a trained cryostat technician.
Leica Cryostat Cooling System Repair Available Nationwide
Fast response • Nationwide service • Leica cryostat specialists
Final Thoughts on Leica Cryostat Reliability and Maintenance
Leica cryostats are widely regarded as the most reliable and precise cryostats available for histology and Mohs laboratories. Their engineering quality, durability, and cutting precision make them the preferred choice for frozen sectioning worldwide.
However, like all precision laboratory instruments, cryostats require proper adjustment, routine maintenance, and occasional repair. Understanding common issues such as inconsistent sectioning, object head movement problems, temperature instability, and cooling failures allows technicians to troubleshoot quickly and minimize laboratory downtime.
Routine preventive maintenance, proper blade holder adjustment, correct temperature settings, and periodic inspection of refrigeration components help ensure long-term reliability and optimal performance.
Need Help with Your Leica Cryostat?
Amtech Medical provides nationwide cryostat service, preventive maintenance, and repair for Leica cryostats and histology laboratory equipment.
Midmark exam chairs are some of the most trusted and widely used pieces of equipment in medical and dermatology practices. Known for their heavy base plate (weighing around 400 pounds), these chairs maintain a low center of gravity, offering unmatched stability even with heavier patients raised high in the air. Compared to lighter alternatives like Silverfox chairs, which lack a stabilizing base and can feel top-heavy, Midmark chairs are safer, sturdier, and built with high-quality American-made motors and components.
They don’t use real leather — instead, Midmark opts for synthetic fabrics and plastics in non-structural areas, while relying on durable metals and actuators that are designed to outlast most competitors. Still, no piece of equipment is immune to wear and tear. Below are the most common Midmark chair problems users encounter, what causes them, and how to fix or prevent them.
Hand Controller Cable Damage
One of the most frequent (and preventable) issues involves the hand controller. Many users hang the controller over the armrest mounting rail, letting it dangle. Over time, the constant tension frays the coiled black cord, eventually exposing internal wires. Once this happens, the controller stops working and the only fix is a replacement cable — a $350 part.
Signs to watch for:
Cracks or breaks in the black coiled cord
Exposed wires underneath the plastic insulation
Intermittent or no response from the controller
Solution: Avoid hanging the controller on the armrest. Instead, use inexpensive mounting buttons or holsters (around $7 each) that attach to the armrest rails. These keep the controller secure and dramatically reduce wear on the cord.
If the footrest isn’t responding, it’s often not an electrical issue at all but rather a safety lockout built into the chair’s design.
Common causes:
The storage drawer located beneath the seat isn’t fully pushed in. If extended, it blocks footrest movement to prevent a collision.
The footrest extension is partially pulled out. Unless fully retracted, the chair won’t allow movement.
Fix:
Push the under-seat drawer fully in until it clicks.
Retract the footrest extension completely.
If the problem persists, unplug and replug both the chair and the controller to reset connections.
These are simple user checks that can save a service call.
Chair Completely Unresponsive (No Movement at All)
Sometimes a Midmark chair will stop responding entirely after a power surge or fluctuation. This happens when the control board’s memory is disrupted.
First steps to try:
Unplug and replug the chair.
Disconnect and reconnect the controller.
If that doesn’t work, the issue may require a memory reset procedure on the main board. Important note: this must be performed by a certified technician. Attempting to reset the board incorrectly can further corrupt the memory and even damage the circuitry, requiring a full board replacement.
Other possible causes include blown fuses or a failed control board, but these are usually diagnosed after the simpler checks.
Controller Ports and Connector Damage
Another frequent issue comes when multiple controllers (hand and foot) are plugged in. Sometimes the hand controller stops working while the foot control still functions.
The culprit is often the connector at the back of the chair. Staff walking around the chair may accidentally kick the plug, bending or damaging the small pins inside. Once bent, the controller will no longer communicate with the chair.
How to fix:
Disconnect the controller and inspect both sides of the connector. Look for bent or broken pins.
Check the socket on the chair itself for damage.
If damaged, send the controller in for service or replacement.
Prevention: Install a protective security bracket around the connector. These brackets act like guards, preventing accidental kicks from damaging the port.
Actuator Motor Wear
Though Midmark uses durable American-made actuator motors, they can wear out over years of use. Signs include jerky chair movement, failure to fully raise or lower, or strange noises when adjusting positions.
Solution: Worn actuators require replacement. While less common than cable or connector issues, actuator failure is still a predictable maintenance concern after long-term use.
Best Practices to Prevent Midmark Chair Problems
Always use holsters or mounting buttons for hand controllers.
Keep the under-seat drawer and footrest extension fully retracted before adjusting chair positions.
Protect connectors with security brackets to prevent accidental kicks.
Unplug and replug after power fluctuations before calling for service.
Schedule preventive maintenance yearly to inspect actuators, fuses, and wiring.
Final Thoughts
Midmark chairs stand apart from cheaper alternatives thanks to their heavy base plate, stability, and reliable American-made motors. However, even the best chairs require proper handling and maintenance. Most problems — from damaged cords to blocked footrests — come down to user habits and can be avoided with simple best practices.
By addressing small issues early and taking preventive steps, you can dramatically extend the life of your Midmark exam chair while reducing costly repairs and downtime.
The Cutera Enlighten is a premium dual-pulse laser system widely used for tattoo removal and advanced dermatologic treatments. Utilizing both picosecond and nanosecond pulse technology, the Enlighten provides superior treatment efficiency, faster results, and reduced tissue damage compared to older laser systems.
Its advanced optical architecture allows clinics to deliver precise, controlled energy to targeted tissue, making it one of the most effective tattoo removal and pigmentation treatment systems available today.
Why Proper Maintenance is Critical
The Enlighten’s advanced optical and calibration systems require routine maintenance to ensure consistent performance. Issues such as lens contamination, calibration drift, and optical component wear can reduce treatment effectiveness and lead to system errors.
This guide covers the most common Cutera Enlighten problems, explains their causes, and outlines practical solutions to help minimize downtime and maintain optimal performance.
Loss of Treatment Effectiveness (Dirty or Damaged Lens Insert)
One of the most common Cutera Enlighten performance issues is reduced treatment effectiveness caused by contamination or damage to the handpiece lens insert. This issue can develop gradually and may not trigger any error codes, making it difficult to detect initially.
Common symptoms include:
Reduced treatment effectiveness
Slower tattoo clearance
Decreased visible tissue response
No system error codes present
Root Cause
Lens contamination or optical damage
Debris such as skin particles, hair, treatment residue, and carbon buildup can accumulate on the lens surface. Over time, laser exposure may also cause permanent burn spots in the lens coating, reducing optical efficiency.
Recommended Solution
Inspect the lens insert regularly for contamination or damage
Clean the lens daily using 91%+ isopropyl alcohol or acetone with a lint-free applicator
Replace lens inserts when performance declines
Use manufacturer-approved replacement components
Why this matters:
Maintaining a clean, undamaged lens ensures maximum energy delivery, faster treatment results, reduced procedure time, and improved patient satisfaction.
Cutera Enlighten Error Code 1530 – Energy Detector Mismatch
Error Code 1530 is a safety-related fault that prevents laser operation when internal energy measurements are inconsistent. This protects patients and ensures accurate energy delivery.
Common symptoms include:
Laser will not fire
Error Code 1530 displayed on screen
System shutdown during operation
Root Cause
Energy calibration mismatch
The Enlighten contains redundant energy detectors. If their readings differ by more than approximately 20%, the system shuts down to prevent unsafe operation.
Resolution
This issue requires professional calibration by a qualified laser service technician. Energy detectors must be tested and recalibrated using specialized diagnostic equipment.
Nationwide service • Fast turnaround • Experienced technicians
Preventive Maintenance Best Practices
Clean lens inserts daily
Schedule annual preventive maintenance
Inspect optical components regularly
Address error codes immediately
Maintain proper cleaning protocols
Final Thoughts on Cutera Enlighten Reliability and Maintenance
The Cutera Enlighten remains one of the most advanced and reliable laser systems available for tattoo removal and dermatologic treatments. Its dual picosecond and nanosecond capabilities provide exceptional clinical results, allowing providers to deliver faster treatments with improved precision and patient outcomes.
Like all high-performance laser systems, consistent maintenance is essential to ensure optimal performance. Many common issues—such as reduced treatment effectiveness, calibration mismatches, or optical component wear—can be prevented through routine inspection, proper cleaning, and scheduled preventive maintenance.
By addressing minor issues early and maintaining proper service intervals, clinics can extend the lifespan of their Enlighten system, minimize downtime, and maintain consistent treatment quality. When more complex issues arise, professional service ensures the system is properly calibrated, repaired, and returned to peak operating condition.
Professional Maintenance Protects Your Investment
Routine preventive maintenance, optical cleaning, and calibration ensure your Cutera Enlighten continues delivering reliable, consistent performance. Proactive service reduces unexpected downtime and protects the long-term value of your laser system.
Need Help with Your Cutera Enlighten Laser?
Amtech Medical provides nationwide Cutera Enlighten service, repair, calibration, and preventive maintenance.