What Is a Mohs Lab? A Complete Guide

Microbiology lab tissue sample slide, histology, pathology, laboratory, cellular structure, scientific research, medical diagnostics, histopathology.

If you work in dermatology or have ever heard of Mohs micrographic surgery, you’ve probably come across the term Mohs lab. But what exactly is it? And why is it so central to modern skin cancer treatment?

This guide breaks down everything you need to know about Mohs labs: what they are, what happens inside them, why they exist, and the equipment they use every single day.


What Is a Mohs Lab?

A Mohs lab is a specialized laboratory attached to a dermatology practice that performs tissue processing and analysis during Mohs surgery — the gold-standard procedure for removing certain types of skin cancer.

Unlike traditional pathology labs, which may take days to process samples, a Mohs lab is designed for speed and precision. It prepares, freezes, sections, stains, and analyzes tissue samples while the patient is still in the office.

The goal: confirm whether cancer cells remain at the surgical margins and guide the surgeon in real time until all cancer is removed.


What Happens in a Mohs Lab?

The workflow inside a Mohs lab is tightly connected to the surgical procedure:

  1. Tissue Removal – The surgeon excises a thin layer of tissue from the patient.
  2. Mapping & Orientation – The specimen is carefully inked and mapped to match the surgical site, ensuring precise orientation.
  3. Embedding & Freezing – The specimen is embedded in OCT compound and frozen in the cryostat.
  4. Sectioning – The frozen tissue block is sliced into thin sections (5–10 microns) using the cryostat’s microtome.
  5. Slide Preparation – Tissue slices are mounted on slides.
  6. Staining – Slides are stained, often with hematoxylin and eosin (H&E), so cells are visible under the microscope.
  7. Examination – The surgeon or a pathologist reviews the slides immediately. If cancer cells are present, another layer is removed, and the cycle repeats.

This process continues until all margins are cancer-free.


Why Do We Need Mohs Labs?

Mohs labs exist because time and accuracy matter in skin cancer surgery. Traditional pathology methods take much longer — tissue is fixed, dehydrated, embedded in paraffin, and processed over hours or days. For patients, that means waiting for results and sometimes needing multiple surgeries.

Mohs labs solve this by:

  • Providing same-day results – Patients know before they leave whether all the cancer has been removed.
  • Preserving healthy tissue – By only removing tissue with cancer at the margins, surgeons minimize scarring and disfigurement.
  • Delivering higher cure rates – Mohs surgery has cure rates of up to 99% for certain cancers, thanks to this precise lab work.

Equipment Found in a Mohs Lab

A Mohs lab is compact but packed with highly specialized equipment:

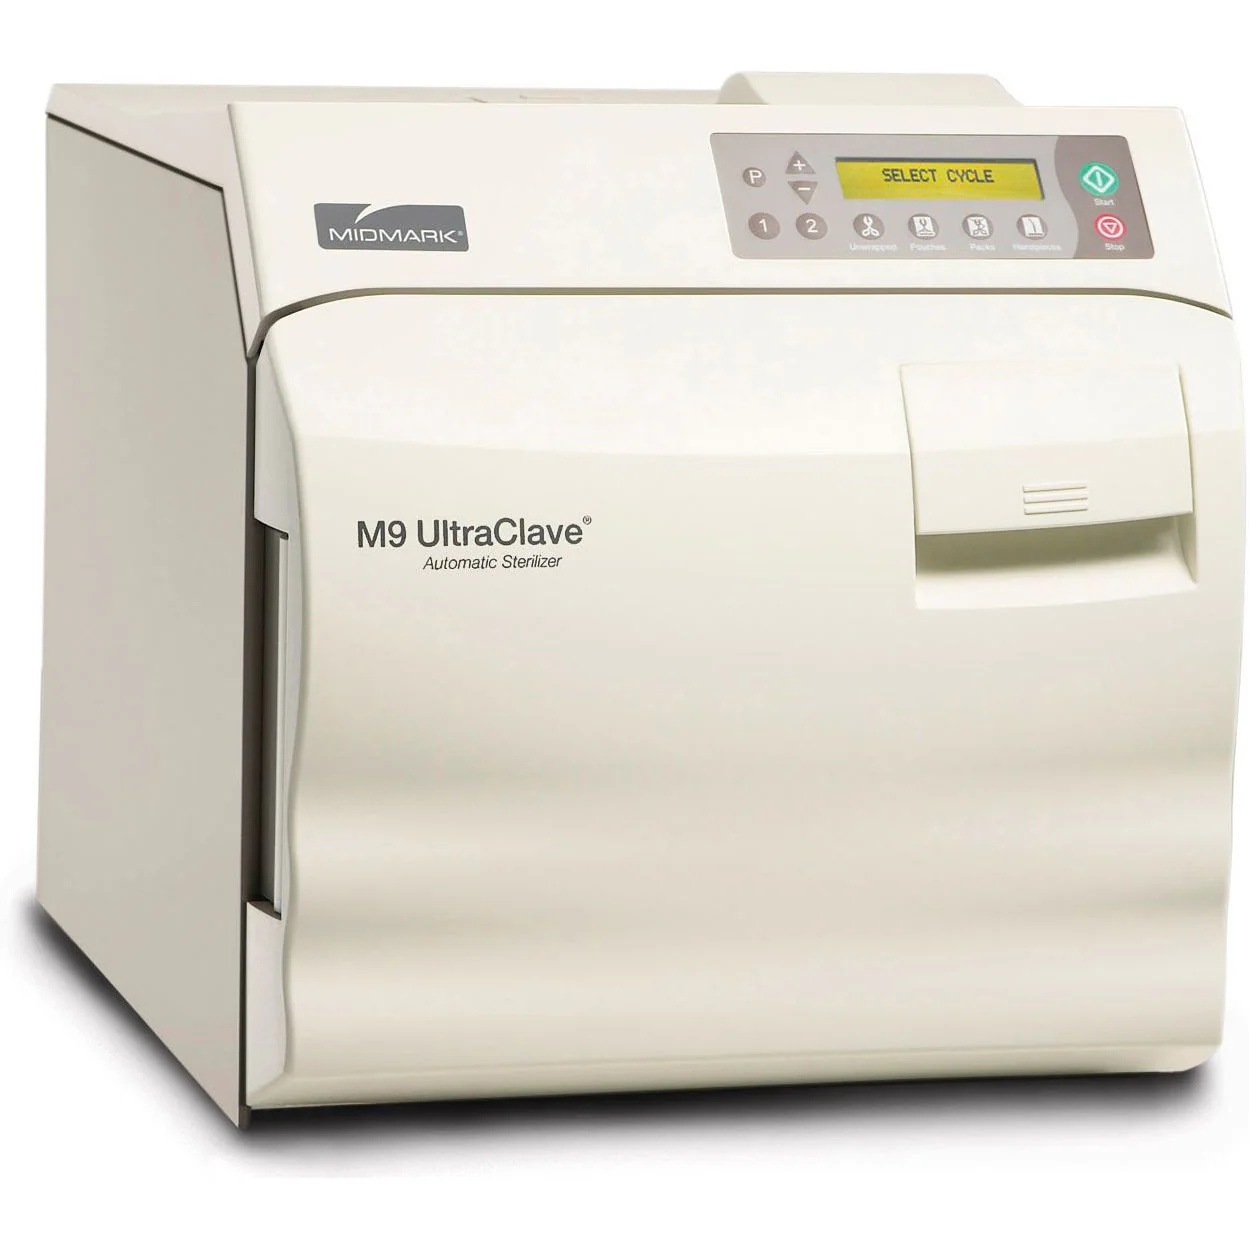
  • Cryostat – The centerpiece of any Mohs lab, used to freeze and section tissue.
  • Microscope – Allows the surgeon to examine stained tissue slides for cancer cells.
  • Embedding station – For orienting and embedding tissue in OCT compound before freezing.
  • Staining setup – Ranges from simple manual staining trays to automated stainers.
  • Freezers – Used for storing reagents and sometimes tissue.
  • Workstations – For tissue inking, mapping, and documentation.
  • Consumables & Accessories – OCT compound, slides, coverslips, staining reagents, scalpels, brushes, forceps, and PPE.

Some labs also include digital pathology equipment for imaging and documenting slides, although this is less common in smaller dermatology practices.


Who Works in a Mohs Lab?

Depending on the size of the practice, Mohs labs may be staffed by:

  • Surgeons – Often dermatologic surgeons perform the slide reading themselves.
  • Histotechnicians (Histotechs) – Specially trained lab staff who embed, cut, and stain tissue.
  • Lab Assistants – Supportive roles like slide labeling, reagent prep, or documentation.

Because speed is critical, Mohs labs often run like a well-oiled machine with clear roles for every team member.


The Importance of Workflow

A Mohs lab isn’t just about the equipment — it’s about the workflow. Every step, from inking tissue to mounting slides, must be done quickly, accurately, and with absolute attention to orientation.

If a specimen is mis-labeled, poorly oriented, or cut incorrectly, the entire surgical process can be compromised. That’s why training, standardized procedures, and preventive maintenance are so crucial in Mohs labs.


The Bigger Picture: Why Mohs Labs Matter

Skin cancer is the most common cancer in the United States, and Mohs surgery is the most precise way to treat it. The Mohs lab makes this procedure possible.

Without it, surgeons would be left waiting days for results — and patients would face longer recoveries, multiple surgeries, and higher recurrence rates.

By combining surgery and lab work into a single, same-day process, Mohs labs:

  • Reduce patient anxiety
  • Lower healthcare costs
  • Improve cosmetic outcomes
  • Deliver the highest possible cure rates

Final Thoughts

A Mohs lab is more than just a room with a cryostat — it’s the engine behind modern skin cancer surgery. From freezing and slicing tissue to staining and slide analysis, every step inside a Mohs lab is designed to support the surgeon in delivering fast, accurate, and effective care.

For dermatology practices, investing in a well-equipped, well-trained Mohs lab is an investment in patient trust, clinical outcomes, and long-term success.


Additional Resources


The Most Common Problems with Midmark Procedure Lights (And How to Fix Them)

The Most Common Problems with Midmark Procedure Lights (And How to Fix Them)

Midmark procedure lights are widely used across medical offices, dermatology clinics, outpatient surgical centers, and examination rooms. These lights provide the bright, focused illumination required for precision procedures, ensuring clinicians have clear visibility during examinations, biopsies, and surgical work. Available in both mobile and ceiling-mounted configurations, Midmark lights are known for their durability, smooth positioning, and dependable performance.

Over time, Midmark has produced multiple generations of procedure lights. Two of the most commonly encountered models today are the halogen-based Midmark 355 and the newer LED-based Midmark 255. While both systems are designed for long-term reliability, their internal components and failure patterns differ significantly.

Common Midmark Procedure Light Models:
  • Midmark 355: Traditional halogen-bulb procedure light with transformer-driven illumination
  • Midmark 255: Modern LED-based procedure light with longer lifespan and reduced maintenance requirements

Although these lights are engineered for longevity, electrical components, bulbs, and LED boards eventually wear out. Understanding the most common Midmark procedure light problems helps clinics troubleshoot quickly, reduce downtime, and determine when professional service is required.

Midmark 355 Light Will Not Turn On

One of the most frequently reported issues with the Midmark 355 procedure light is complete loss of illumination. Because this model relies on a halogen bulb and transformer system, multiple components must function correctly for proper operation.

Common symptoms include:
  • Light does not turn on when power switch is activated
  • Bulb intermittently works, then fails again
  • No visible illumination despite confirmed power connection

Most Common Causes

  • Burned-out halogen bulb
  • Incorrect bulb type causing premature failure
  • Transformer supplying excessive voltage
  • Pinched or damaged internal wiring within mounting arm

Recommended Fix and Best Practices

  • Replace the halogen bulb using gloves or lint-free cloth
  • Verify correct bulb model and voltage specifications
  • Inspect transformer output if bulbs fail repeatedly
  • Check wiring integrity if light fails intermittently or only in certain positions

If wiring damage or transformer issues are suspected, professional service may be required to safely diagnose and repair internal electrical components.

Midmark 255 LED Board Failure

The Midmark 255 uses an integrated LED illumination system instead of a traditional halogen bulb. While LEDs provide significantly longer lifespan and improved efficiency, failure typically occurs at the board level rather than a single replaceable bulb.

Common symptoms include:
  • Light fails completely with no illumination
  • No response despite confirmed electrical power
  • Sudden loss of function without gradual dimming

Underlying Causes

  • Failure of LED driver board
  • Electrical surges damaging sensitive LED circuitry
  • Long-term electrical component wear

Resolution

The most effective solution is replacement of the LED board assembly. Installing surge protection can help extend system lifespan and prevent future failures caused by electrical fluctuations.

Professional Midmark Procedure Light Repair Available

Contact Amtech Medical →

Fast response • Nationwide service • Experienced medical equipment technicians

Midmark 355 Bulb Cracking or Overheating

Premature bulb cracking or overheating is another common issue with halogen-based Midmark 355 lights. This problem is often related to improper bulb handling during installation rather than internal system failure.

Root Cause

Halogen bulbs are extremely sensitive to contamination. Oils from skin create microscopic hot spots on the glass surface. When the bulb heats during operation, these areas overheat and cause the glass to crack prematurely.

Recommended Prevention

  • Always wear gloves when installing halogen bulbs
  • Use lint-free cloth if gloves are unavailable
  • Ensure power is turned off during bulb replacement
  • Avoid touching glass surface directly

Proper bulb handling significantly extends bulb lifespan and prevents unnecessary replacement costs.

Midmark Procedure Light Sways or Will Not Hold Position

Proper positioning stability is essential for any procedure light. When a Midmark light begins drifting, swaying, or failing to hold its position, it can interfere with clinical workflows and compromise procedural visibility. This issue most commonly affects mobile stand-mounted units or articulated ceiling-mounted systems.

Common symptoms include:
  • Light slowly drifts downward after positioning
  • Light feels loose or unstable at pivot joints
  • Difficulty maintaining stable illumination during procedures
  • Light arm moves too freely or lacks resistance

Underlying Cause: Counterweight Imbalance

Midmark procedure lights rely on a precision counterweight system to maintain balance throughout the full range of motion. Over time, normal wear, improper adjustment, or component fatigue can cause the counterweight system to lose alignment. When this occurs, the articulated arm cannot properly counterbalance the weight of the light head.

Recommended Resolution

  • Adjust counterweight positioning to restore balance
  • Inspect pivot joints for excessive wear
  • Replace worn counterweight or balance components if necessary
  • Verify proper installation and mounting alignment

If adjustments do not resolve the issue, professional service may be required to repair or replace internal balance components.

Understanding Long-Term Reliability of Midmark Procedure Lights

Midmark procedure lights are widely recognized for their durability and long service life. The Midmark 355 halogen model typically requires more frequent maintenance due to bulb replacement needs, while the Midmark 255 LED model offers extended lifespan with fewer service requirements.

Most failures occur due to normal component aging, electrical wear, or environmental factors such as electrical surges or improper handling. Fortunately, these issues are generally straightforward to repair, and properly maintained Midmark lights can remain operational for many years.

Typical component lifespan expectations:
  • Halogen bulbs: Require periodic replacement depending on usage
  • LED boards: Longer lifespan but require replacement upon failure
  • Counterweight and pivot systems: Long-lasting with proper adjustment
  • Electrical wiring and transformers: Extremely durable when properly installed

Routine maintenance and proper handling significantly extend the lifespan and reliability of Midmark procedure lights.

Preventive Maintenance Best Practices for Midmark Lights

Implementing preventive maintenance practices helps minimize downtime, extend component lifespan, and ensure reliable illumination performance. Most Midmark light issues can be prevented through proper handling, electrical protection, and routine inspection.

Recommended preventive maintenance practices:
  • Use gloves when installing halogen bulbs to prevent premature failure
  • Install surge protection to protect LED boards and electrical components
  • Ensure proper installation to prevent wiring damage
  • Inspect counterweight balance periodically
  • Keep replacement bulbs available for halogen systems
  • Schedule routine professional equipment inspections

Preventive care helps avoid unexpected failures and ensures consistent clinical performance.

Final Thoughts on Midmark Procedure Light Reliability and Repair

Midmark procedure lights are designed to provide dependable illumination in demanding clinical environments. Their simple, robust design allows most issues to be resolved quickly, whether through bulb replacement, LED board repair, electrical troubleshooting, or counterweight adjustment.

By identifying and addressing minor issues early, clinics can prevent larger failures and maintain uninterrupted operation. Routine maintenance, proper installation, and electrical protection play a critical role in maximizing system lifespan.

When professional repair is required, prompt service ensures safe, reliable operation and minimizes downtime.

Need Midmark Procedure Light Repair or Maintenance?

Contact Amtech Medical →

Fast response • Nationwide service • Experienced medical equipment technicians

The Most Common Problems with the Candela Vbeam Perfecta (And How to Fix Them)

Vbeam perfecta problems

The Candela Vbeam Perfecta is one of the most trusted pulsed dye lasers in dermatology. Designed primarily for vascular treatments such as veins, rosacea, and scars, it also has off-label uses for warts and other skin conditions.

What makes the Vbeam unique is its 595 nm wavelength. Sitting in the yellow-orange range of visible light, this wavelength is absorbed especially well by blue vessels, making it highly effective for vascular work.

Key Technical Difference: Dye-Based Laser System

Unlike solid-state lasers, the Vbeam is a dye-based laser. This architecture provides exceptional vascular targeting performance, but also introduces unique maintenance requirements and long-term service considerations.

Because of this design, the Vbeam has specific quirks around routine maintenance, optical transmission, and dye lifespan.

Here are the most common problems and error codes seen with the Candela Vbeam Perfecta, what they mean, and how to address them.

Fault 15 – Transmission Error

If you’ve ever seen your Vbeam throw a Fault 15 message during calibration, you know how disruptive it can be. Treatments stop, calibration fails, and patient schedules are affected.

This fault indicates a transmission loss between the laser head and the handpiece. In simple terms, the energy generated inside the system is not reaching the treatment area efficiently.

When the system detects approximately 25–30% transmission loss, it shuts down operation to prevent ineffective or unsafe treatment delivery.

Common clinical symptoms include:
  • Calibration failure
  • Weak or inconsistent output
  • Noticeable dead spots during treatment
  • Reduced treatment effectiveness

Primary Causes

  • Damaged or degraded fiber optic line
  • Worn or contaminated slider lenses
  • Debris shield contamination or wear

Recommended Fix and Best Practices

Daily debris shield cleaning with alcohol is the simplest and most effective preventive measure.

If Fault 15 appears, try switching handpiece sliders. For example, move from a 7 mm slider to a 5 mm or 10 mm slider.

If the fault resolves, the original slider likely needs repair or replacement. If the fault persists across multiple sliders, fiber damage may require professional service.

Fault 6 – Calibration Fault

Calibration is a built-in safety system that verifies energy output accuracy whenever settings are changed.

When the system cannot achieve the requested energy level, it generates Fault 6 and prevents operation.

Typical signs include:
  • Error during calibration
  • Failure to reach selected energy levels
  • No improvement after cleaning or slider changes

Underlying Cause

Unlike Fault 15, Fault 6 typically indicates an internal energy generation issue rather than a transmission problem.

  • Dye cartridge approaching end-of-life
  • Internal mirror degradation
  • Laser optics efficiency loss

Solution

Fault 6 requires professional service to restore proper laser generation and calibration accuracy.

Professional Candela Vbeam Perfecta Service Available

Contact Amtech Medical →

Fast response • Nationwide service • Experienced laser technicians

Fault 12 – Energy Out of Range / Energy Imbalance

If you’ve ever seen your Vbeam display an Energy Out of Range or imbalance warning, it is usually an early indicator of dye depletion. This fault appears when the laser can no longer maintain consistent energy output.

How It Appears in Clinical Use

  • Energy output becomes inconsistent
  • Treatments appear weaker than expected
  • Output performance fluctuates
  • The system eventually displays Fault 12

Why This Happens

The Vbeam generates laser output using a series of precisely timed sub-pulses. These pulses must remain balanced to deliver proper treatment energy.

As the dye begins to break down, energy generation becomes uneven. The system detects this imbalance and triggers Fault 12 before performance degrades further.

Resolution

Fault 12 almost always indicates that the dye cartridge has reached the end of its usable lifespan and requires replacement.

Once the dye kit is replaced and the system is recalibrated, energy consistency and treatment performance return to normal.

Professional Candela Vbeam Perfecta Service Available

Contact Amtech Medical →

Fast response • Nationwide service • Experienced laser technicians

Understanding Dye Lifespan and Ownership Expectations

The Candela Vbeam Perfecta is one of the most reliable dermatology lasers available, but its dye-based architecture means the dye has a finite lifespan.

Most dye kits last approximately 40,000–50,000 pulses, with a manufacturer guarantee of around 20,000 shots or one year.

High-volume clinics may exhaust dye kits in months, while lower-volume clinics may reach expiration based on calendar time rather than shot count.

Preventive Maintenance Tips for Vbeam Perfecta

  • Clean debris shields daily
  • Replace shields proactively
  • Rotate handpiece sliders when needed
  • Track shot counts
  • Schedule annual preventive maintenance

Final Thoughts

The Candela Vbeam Perfecta remains one of the most versatile and effective vascular lasers in dermatology.

Understanding dye lifespan and fault codes such as Fault 6, 12, and 15 helps clinics minimize downtime and maintain optimal performance.

With proper preventive maintenance and timely service, the Vbeam Perfecta delivers reliable performance for many years.

Need Help with Your Candela Vbeam Perfecta?

Contact Amtech Medical →

Fast response • Nationwide service • Experienced laser technicians

References and Additional Resources

The following trusted clinical and manufacturer resources provide additional technical and medical information regarding pulsed dye lasers, Candela Vbeam systems, and laser safety.

The Most Common Problems with Silverfox Chairs (And How to Fix Them)

The Most Common Problems with Silverfox Chairs (And How to Fix Them)

Silverfox procedure chairs are widely used in dermatology clinics, aesthetic practices, and medical spas due to their versatility, patient comfort, and affordability. These chairs provide reliable positioning support for a wide range of treatments, from laser procedures to examinations and cosmetic treatments.

While Silverfox chairs are generally dependable, their high usage volume means certain mechanical and structural components experience wear over time. Understanding these common failure points allows clinics to troubleshoot problems quickly, minimize downtime, and extend equipment lifespan.

Technician Insight from Amtech Medical

We spoke with Amtech Medical field service technician Daniel Silva about the most common Silverfox chair failures seen in real-world clinical environments. These issues are consistent across many models and typically involve actuators, armrest assemblies, and cosmetic structural components.

This guide explains the most common Silverfox chair problems, how to identify them, and when professional service is required.

Actuator Failure: Chair Will Not Move or Adjust

Actuator failure is one of the most common issues affecting Silverfox chairs. Actuators are responsible for controlling movement functions such as height adjustment, backrest reclining, and footrest positioning. When an actuator fails, the affected section of the chair becomes completely unresponsive.

Common symptoms of actuator failure include:
  • Backrest does not recline or return upright
  • Footrest does not raise or lower
  • Chair height remains fixed and will not adjust
  • No motor sound, clicking, or movement when pressing the remote
Technical Cause:

In most cases, the actuator itself has failed rather than the control board. Failed actuators typically show no mechanical response when activated. Electrical wear, internal motor failure, and long-term usage are the most common contributing factors.

Recommended Resolution

Actuator replacement requires proper diagnosis to confirm whether the actuator or control system is at fault. Most actuator failures require professional service and component replacement.

Silverfox Chair Actuator Repair Available

Contact Amtech Medical →

Fast response • Nationwide service • Experienced equipment technicians

Broken or Loose Armrests

Armrest assemblies are one of the most frequent structural failure points on Silverfox chairs. Because patients often use armrests for support when getting on or off the chair, excessive force can damage internal mounting components.

Common symptoms include:
  • Armrest becomes loose or unstable
  • Armrest drops suddenly or will not hold position
  • Visible structural looseness or stripped mounting hardware
  • Armrest hangs or dangles freely
Technical Cause:

Silverfox armrests rely on mounting bolts and structural stops to maintain positioning. Excessive weight or repeated stress can strip threads or deform mounting points, resulting in loss of structural stability.

Depending on the severity, armrest repair may involve hardware replacement or full armrest assembly replacement.

Loose or Detached Plastic Covers

Silverfox chairs use protective plastic covers to conceal internal components and maintain a clean, professional appearance. These panels are typically secured using push-pin fasteners, which can loosen or fail over time.

Common signs include:
  • Plastic panels hanging or detached beneath the chair
  • Visible gaps in cosmetic trim or housing
  • Panels temporarily secured using tape
  • Loose or missing push-pin fasteners
Recommended Resolution:
  • Replace worn push-pin fasteners
  • Reattach loose plastic panels securely
  • Replace damaged plastic covers if necessary

While cosmetic issues do not typically affect chair functionality, maintaining structural integrity improves safety, durability, and professional appearance.

Footrest Extension Sensor Prevents Movement

Many Silverfox chairs include an extendable footrest designed to accommodate taller patients. This extension mechanism includes a built-in safety sensor that prevents footrest movement when the extension is not fully retracted. This safety feature protects internal mechanical components from damage during operation.

Common symptoms include:
  • Footrest does not move when using the remote
  • Other chair functions operate normally
  • Footrest extension visibly remains partially extended
  • No mechanical noise or actuator movement from footrest
Technical Cause:

The safety interlock sensor prevents actuator movement when the extension is not fully seated. This protects the actuator system and mechanical linkage from stress or misalignment damage.

Recommended Resolution

  • Fully retract the footrest extension until seated properly
  • Verify the extension mechanism is properly aligned
  • Test footrest operation after re-seating extension

This issue is typically resolved without service once the extension is fully seated.

Upholstery Wear, Cracking, and Cosmetic Damage

Silverfox chairs experience upholstery wear over time, particularly in high-volume practices where chairs are used continuously throughout the day. While this does not affect mechanical functionality, it can impact patient perception and overall clinic appearance.

Common signs of upholstery wear include:
  • Cracking or peeling on seat cushions or backrests
  • Discoloration or fading of upholstery surfaces
  • Tears forming near seams or high-stress areas
  • Visible cosmetic deterioration with continued usage
Resolution Options:
  • Replace individual upholstery panels
  • Install replacement upholstery kits
  • Perform professional reupholstery services
  • Replace chair if structural wear is extensive

Maintaining upholstery helps preserve both patient comfort and professional presentation.

Understanding Long-Term Reliability of Silverfox Chairs

Silverfox chairs are designed to provide affordable and practical positioning solutions for dermatology and aesthetic clinics. Their widespread use reflects their reliability, but certain components experience wear faster due to their lightweight construction and frequent use.

Most common long-term wear points include:
  • Actuator motor assemblies
  • Armrest mounting hardware
  • Plastic housing and cosmetic covers
  • Footrest extension sensors and linkage systems
  • Upholstery materials and protective coverings

These wear patterns are normal for frequently used clinical equipment and can be managed through routine maintenance and timely repairs.

Preventive Maintenance Best Practices for Silverfox Chairs

Routine preventive care significantly extends the lifespan of Silverfox chairs and reduces the likelihood of unexpected failures. Early detection of wear allows clinics to address issues before they affect operations.

Recommended preventive maintenance practices:
  • Avoid placing excessive weight on armrests
  • Inspect structural hardware regularly for looseness or wear
  • Replace worn push-pin fasteners as needed
  • Ensure footrest extensions are properly seated during use
  • Clean and maintain upholstery regularly
  • Schedule professional equipment inspections annually

Preventive maintenance reduces downtime, improves safety, and extends equipment service life.

Silverfox Chair Repair, Parts, and Service Support

Silverfox chairs provide dependable positioning and comfort for a wide range of treatments. While certain components experience wear over time, most issues can be resolved quickly through proper diagnosis and repair.

Understanding early warning signs and implementing preventive maintenance ensures reliable performance and minimizes disruption to your clinical workflow.

Need Silverfox Chair Repair or Replacement Parts?

Contact Amtech Medical →

Fast response • Nationwide service • Experienced equipment technicians

The Most Common Problems with Tabletop Autoclaves (And How to Fix Them)

Automatic medical sterilizer for hospital and clinical use.

TabTabletop autoclaves are the backbone of sterilization for small medical offices, dermatology practices, dental clinics, and medspas. Compact yet powerful, they ensure instruments are sterilized safely, protecting both patients and providers.

But like any equipment, these autoclaves develop recurring issues — usually from daily wear, skipped maintenance, or environmental factors like poor water quality. The good news is that many of these problems can be diagnosed quickly, and in some cases, fixed without waiting on a service call.

Below we’ll walk through the most common autoclave problems, what causes them, and what to do next. Along the way, we’ll include real-world scenarios to show how these issues play out in the field.


1. Autoclave Won’t Power On

Imagine this: a dermatology clinic is getting ready for back-to-back procedures, but the autoclave won’t even light up. The front desk is panicking, because without sterilized instruments, the day’s schedule is on the line.

Common Causes:

  • Loose power cable or faulty outlet
  • Tripped circuit breaker or blown fuse
  • Faulty door switch (some autoclaves won’t power unless the door is fully closed)

Fix:

  • Confirm the outlet works by testing another device.
  • Inspect the fuse or breaker and replace/reset as needed.
  • Check that the door is latched tightly — on many tabletop units, an incomplete latch interrupts the power circuit.
  • If it still won’t start, the control board or wiring likely needs professional repair.

2. Chamber Won’t Pressurize

One of the most common calls we get is: “The cycle runs, but the autoclave never builds pressure.” In one case, a medspa reported hearing faint hissing during every cycle — sure enough, the door gasket had cracked, and steam was escaping instead of building pressure.

Causes:

  • Worn or cracked door gasket
  • Loose or unevenly latched door
  • Scale buildup around valves from using tap water instead of distilled
  • Leaky fittings or solenoid valves

Fix:

  • Replace door gaskets annually, or sooner if cracks or flattening appear.
  • Confirm the door closes evenly — sometimes hinges loosen over time.
  • Clean valves and fittings.
  • Always use distilled water only to prevent scale buildup.

3. Sterilization Cycle Won’t Complete

A dental practice once reported their autoclave was aborting halfway through every cycle. After inspection, we found the drain filter was clogged with cotton fibers from gauze packs. Airflow was restricted, steam couldn’t circulate, and cycles failed.

Causes:

  • Overloaded chamber (steam can’t circulate)
  • Drain filter clogged
  • Faulty temperature or pressure sensors
  • Heating element wearing out

Fix:

  • Load instruments loosely, allowing space for steam.
  • Clean the drain filter weekly — it’s small but critical.
  • If problems persist, sensors or heaters may require replacement.

4. Wet Packs After a Cycle

Few things frustrate staff more than opening the door to find wet, dripping packs. Not only is it unsafe (moisture can harbor microbes), but it means re-running the cycle — doubling sterilization time.

Causes:

  • Chamber overloaded
  • Improper wrapping material
  • Drain line partially clogged
  • Door gasket leaking steam at the wrong time

Fix:

  • Reduce load size and leave room between packs.
  • Only use wraps designed for autoclaves.
  • Inspect drain lines and clean if blocked.
  • Replace or lubricate the door gasket if leaking.

5. Strange Noises or Leaks

Another medspa complained about “knocking” sounds during cycles. After inspection, we found scale buildup inside the steam lines — mineral deposits from using tap water. The fix was a thorough descaling and a reminder to always use distilled water.

Causes:

  • Solenoid valve beginning to fail
  • Loose or worn chamber gasket
  • Mineral buildup in chamber or tubing

Fix:

  • Replace worn seals and valves.
  • Perform regular descaling treatments (especially in hard-water areas).
  • Call for service if noises persist — they can indicate valve timing issues.

6. Error Codes or “Service Required”

Modern tabletop autoclaves have error codes for safety. These can be intimidating, but often they point directly to the issue.

For example, an error might indicate a temperature sensor failure — meaning the unit isn’t sure how hot it actually is. In one dermatology office, a persistent error code turned out to be nothing more than a faulty door switch, replaced in under 30 minutes.

Common Codes Indicate:

  • Sensor failure (temp/pressure)
  • Electrical heating fault
  • Board communication error
  • Door/lid not sealed properly

Fix:

  • Try a full power cycle.
  • Refer to the user manual for code meaning.
  • Some fixes are user-friendly (gaskets, switches), but persistent codes often need a technician.

Preventive Care to Avoid Most Problems

In almost every scenario above, the problem could have been prevented with basic care.

  • Use distilled water only — tap water = scale buildup.
  • Clean the drain filter weekly.
  • Check gaskets monthly and replace annually.
  • Avoid overloading to allow proper steam circulation.
  • Schedule yearly preventive maintenance to catch small issues before they shut you down.

Final Thoughts

Tabletop autoclaves are dependable workhorses, but they’re not invincible. From leaking gaskets to wet packs, most problems follow predictable patterns and can be solved with simple checks.

By knowing what to look for — and addressing issues early — you can keep your autoclave running smoothly, minimize downtime, and protect patient safety.

And when the fix goes beyond basic troubleshooting? That’s where professional technicians step in. Having a trusted service partner means peace of mind that your autoclave is always ready when you need it most.


Looking for a Replacement?

Sometimes, repairing an older tabletop autoclave just isn’t cost-effective. If the heating element, control board, or chamber itself is failing, the repair costs may approach the price of a new unit.

That’s where Amtech Medical’s refurbished autoclaves come in.

We stock a range of used, professionally reconditioned autoclaves that are:

  • Fully serviced and tested by our technicians
  • Backed by warranty for peace of mind
  • More affordable than new units — without sacrificing reliability
  • Available in multiple models and sizes to fit the needs of dermatology, dental, histology, and medspa practices

Choosing a refurbished autoclave from Amtech Medical gives you the confidence of a fully inspected and serviced machine at a fraction of the cost of new. It’s the perfect option for practices that need dependable sterilization without stretching their budget.

👉 Explore our current inventory of used autoclaves on our website or reach out to our team for availability.


Professional Autoclave Service & Support

While some issues with tabletop autoclaves can be fixed in-house, others require a trained technician. Electrical failures, sensor replacements, valve timing issues, and control board repairs should always be handled by professionals to avoid bigger (and more expensive) problems down the line.

At Amtech Medical, we provide:

  • Nationwide Service Coverage – Our technicians travel to support practices across the U.S.
  • Preventive Maintenance Programs – Keep your autoclave reliable with scheduled inspections and cleanings.
  • Emergency Repairs – Fast turnaround when your sterilizer goes down unexpectedly.
  • Multi-Device Support – We service autoclaves alongside your other dermatology, lab, and general medical equipment.

Our goal is simple: minimize downtime and keep your practice running smoothly. With decades of experience across autoclaves, lasers, and diagnostic equipment, our team has the expertise to troubleshoot quickly and get your sterilizer back in operation.

👉 Contact us today to schedule preventive maintenance or request an urgent repair.


Amtech Medical Now Offers the Full Silverfox Catalog

Medical examination room with advanced dental or medical chair and equipment for patient care, modern healthcare setting.

Amtech Medical is excited to announce that we now carry the entire Silverfox catalog of spa, aesthetic, and wellness equipment. Known worldwide for their stylish designs, reliable performance, and value-driven solutions, Silverfox has become a go-to brand for spas, dermatology clinics, estheticians, and wellness centers.

With this expansion, our customers now have access to a comprehensive range of spa furniture, treatment tables, and professional-grade equipment — all in one place.


About Silverfox

Silverfox specializes in spa and esthetician equipment, designed to balance form and function. Their products combine modern aesthetics, durable construction, and practical features that support both professionals and clients.

Trusted globally, Silverfox is recognized for:

  • Variety of Options: From compact, portable devices to full-featured treatment beds.
  • Sleek European-Inspired Design: Stylish yet functional, perfect for both luxury spas and medical aesthetics clinics.
  • Affordable Quality: Professional-grade equipment without the inflated costs of some competitors.
  • Reliability: Built for daily use in busy professional environments.

What’s in the Silverfox Catalog?

The Silverfox catalog covers nearly every category of spa and aesthetics equipment. Here’s a look at the highlights:

1. Spa & Treatment Furniture

  • Facial Beds & Treatment Tables: Adjustable beds with motorized or manual positioning, available in multiple colors (white, grey, black).
  • Multi-Function Treatment Chairs: Ideal for facials, massage, waxing, and body treatments.
  • Stools & Seating: Ergonomic stools for technicians and assistants, designed for long work sessions.
  • Spa Carts & Storage: Rolling trolleys with drawers, trays, and shelves to keep equipment organized.

2. Professional Spa Equipment

  • Facial Steamers: Essential for deep cleansing and hydration treatments, with models ranging from compact to deluxe.
  • High-Frequency Devices: Portable units used for acne treatments, circulation, and skin rejuvenation.
  • Rotary Brush Units: Popular for exfoliation and deep-cleaning facials.
  • Magnifying Lamps & Lamps with Steamers: Essential for detailed skin analysis and treatment accuracy.
  • Paraffin Warmers & Other Specialty Devices: Designed to enhance client experience and expand treatment menus.
  • Weight bases and replacement parts for steamers
  • Magnifying lamp stands and attachments
  • Heat therapy accessories for relaxation and recovery

Why Choose Silverfox?

Silverfox products are designed to meet the needs of both luxury spas and everyday treatment rooms. What sets them apart:

  • Flexibility: A wide range of products suitable for skincare professionals, medspas, massage therapists, and wellness centers.
  • Customization: Multiple color and material options to match your practice or spa design.
  • Durability for High-Use Environments: Whether it’s a spa chair, steamer, or stool, each product is engineered to withstand daily use.
  • Ease of Use: Many devices are compact, portable, and simple to operate, making them ideal for busy practitioners.

While the full catalog includes dozens of options, some products stand out as consistent favorites among professionals:


Final Thoughts

By adding the full Silverfox catalog to our offerings, Amtech Medical is expanding into the spa and aesthetics industry with a complete range of reliable, professional-grade equipment. Whether you’re setting up a brand-new spa or upgrading your current treatment room, Silverfox products deliver style, comfort, and durability at an accessible price point.

👉 Browse the Silverfox catalog today on our website, or contact our team for recommendations on outfitting your spa, wellness center, or aesthetic clinic.

The Complete Guide to CONMED (Buffalo Filter) Smoke Evacuators & Their Filters

Amtech medical disposable medical supplies and equipment for healthcare professionals.

Why smoke evacuation matters (in 30 seconds)

Surgical smoke contains ultra‑fine particles, VOCs and bio‑aerosols. CONMED’s Buffalo Filter line traps these hazards with multi‑stage filtration—ULPA media plus activated carbon—achieving 99.999% efficiency for 0.1–0.2 µm particles on legacy systems, and up to 99.9997% down to 0.01 µm on the newest platform. CONMED


Quick compatibility cheat‑sheet

* Filter life refers to active suction time and is often tracked on the device (VisiClear & ViroVac) to prevent overuse. CONMED+1


Meet the systems (and when to choose each)

PlumeSafe® X5™ — CONMED’s newest 5‑stage platform

If you want the most aggressive capture (including very fine particulates), X5 adds a 5‑stage filter rated 99.9997% down to 0.01 µm, dual 7/8″ ports (run two pencils at once), and a touch interface with three procedure modes. Order filters as PX5‑135‑22 (1/ea) or PX5‑1354‑22 (4/case). CONMED+1

Best for: modern ORs seeking top‑tier particulate and VOC reduction with streamlined workflow.


VisiClear® — quiet, programmable, and OR‑ready

Best for: acute‑care ORs that need quiet operation and flexible setups (including laparoscopy).


ViroVac® — compact value for clinics and ASCs

ViroVac is a smaller footprint unit with variable filter life (up to 35 hours) and a patented covered 3‑port filter design. Order filters as VS353 / VS35302 / VS35304. CONMED

Best for: physician offices and outpatient centers wanting tracked filter life without the bulk.


Legacy & specialty: PlumeSafe Turbo / Whisper / Auto‑Sense, and Porta PlumeSafe® 604

Many practices still run these reliable Buffalo Filter models. They typically pair with ViroSafe 6‑hour filters (VS0600x)—single 7/8″ port—for fast‑turnover procedures. For longer cases or lower staffing touchpoints on the Porta PlumeSafe 604, choose the ViroSafe XLL (dual 7/8″ & 1‑1/4″ ports) up to 18 hours. The 604 is positioned for veterinary and non‑acute environments where moderate flow is appropriate. CONMED


Filter families explained (what’s inside and why it matters)

  • ViroSafe® (VisiClear & ViroVac versions): Four‑stage cartridge (pre‑filter, activated carbon, ULPA, post‑filter). 99.999% efficiency for 0.1–0.2 µm; models differ by porting and rated life (6, 18, or up to 35 hours). CONMED
  • PX5 filter: Next‑gen 5‑stage design, 99.9997% down to 0.01 µm, with dual 7/8″ ports to power two smoke pencils simultaneously. CONMED

Port sizes & adapters at a glance

  • Single 7/8″ (ViroSafe 6‑hr) — simple pencil/tubing setups.
  • Dual 7/8″ & 1‑1/4″ (ViroSafe XLL) — flexibility for high‑flow or mixed accessories.
  • 1/4″, 3/8″, 7/8″ (VisiClear filter) — maximum compatibility on the acute‑care unit.

How to choose the right unit + filter (simple decision flow)

  1. Setting & case mix
  • Acute OR: Start with VisiClear (quiet + modes) or X5 (highest particulate/VOC capture). CONMED+1
  • Clinic/ASC: ViroVac balances cost and capability; small footprint. CONMED
  • Legacy/veterinary/non‑acute: Porta PlumeSafe 604 with XLL or 6‑hr filters. CONMED
  1. Procedure duration
  • Short, high‑turn cases → ViroSafe 6‑hr (VS0600x). McKesson Medical-Surgical
  • Mixed day / fewer change‑outs → ViroSafe XLL (up to 18 hrs). McKesson Medical-Surgical
  • All‑day rooms / tracked usage → VisiClear VS135 or ViroVac VS353 (up to 35 hrs).
  • Max capture spec / forward‑looking → PX5 filter. CONMED
  1. Noise & ergonomics
  • Sensitive rooms benefit from Whisper Technology on VisiClear. CONMED
  1. Automation
  • Add EZLink to auto‑activate suction with the energy device—extends filter life and reduces noise. Works across CONMED evacuators. CONMED

Model snapshots (spec highlights)

  • VisiClear (VC120/VC220): 30 cfm using 7/8″ tubing; <55 dBA at max; 7.1″ H × 13.9″ W × 16.1″ D; includes one filter when ordered as VC120/VC220. CONMED
  • ViroVac (VV120/VV220): compact shelf design; includes footswitch; variable life up to 35 hours; order VS353 filters. CONMED
  • PlumeSafe X5 (PX5‑120 / PX5‑220): dual 7/8″ ports; touch‑sensitive display; 5‑stage filter (PX5‑135‑22 / PX5‑1354‑22). CONMED
  • Porta PlumeSafe 604: portable, moderate‑flow; commonly used in veterinary & non‑acute settings. CONMED

FAQs

What’s the difference between ViroSafe 6, XLL, VS135, and VS353?
They’re all four‑stage ULPA/carbon cartridges, but they’re sized/ported and validated for different units and life ratings: 6‑hour single‑port (legacy Turbo/Whisper/604), XLL up to 18 hours (Turbo/604), VS135 up to 35 hours (VisiClear 3‑port), VS353 up to 35 hours (ViroVac 3‑port with covered ports). McKesson Medical-Surgical+1MFI MedicalCONMED

Do newer systems really capture more than older ones?
Yes. Legacy CONMED/Buffalo cartridges are 99.999% @ 0.1–0.2 µm, while PlumeSafe X5 is rated 99.9997% @ 0.01–0.2 µm thanks to its 5‑stage design. CONMED+1

Will the filters fit across different brands?
CONMED sells some competitive‑replacement filters, but always match your exact evacuator model to its specified filter part numbers to maintain performance specs. Start with the tables above or your device’s brochure/IFU. CONMED

The Most Common Problems with Leica Cryostats (And How to Fix Them)

cryostat-problems

Common Leica Cryostat Problems and How to Fix Them

Leica Biosystems is a German manufacturer globally recognized for producing high-quality histology equipment, microscopes, and laboratory imaging systems. Among their most respected products are Leica cryostats, which are widely considered the industry gold standard for frozen sectioning in histology and pathology laboratories.

Leica cryostats are known for their durability, precision engineering, and user-friendly design. Many laboratories rely on them for years of consistent performance, and both technicians and service engineers frequently praise their reliability. However, like any precision mechanical system, cryostats can develop issues over time due to wear, improper adjustment, or environmental factors.

Why Cryostat Performance Matters

Consistent cryostat performance is essential for producing high-quality frozen sections. Mechanical instability, improper temperature control, or blade holder issues can result in uneven sections, tissue damage, or diagnostic delays. Understanding common problems and their causes helps laboratories maintain reliable operation and avoid unnecessary downtime.

Below, we’ll cover the most common Leica cryostat problems, explain their likely causes, and provide practical troubleshooting steps to restore proper operation.

Inconsistent Cutting (Thick and Thin Sections)

One of the most common Leica cryostat issues is inconsistent section thickness. This often appears as alternating thick and thin sections, ridges, or chatter patterns in the tissue. These irregularities can interfere with accurate histological analysis and may require technicians to repeat sectioning, wasting valuable specimen material.

Common symptoms include:
  • Uneven section thickness
  • Alternating thick and thin bands in tissue sections
  • Visible ridges or chatter patterns
  • Reduced sectioning precision and diagnostic clarity

Likely Causes

Inconsistent sectioning is typically caused by instability within the blade holder assembly or improper blade positioning. Even minor looseness or misalignment can significantly impact cutting performance.

Most common mechanical causes include:
  • Loose locking levers on the blade holder
  • Blade holder not securely mounted to the microtome base
  • Misaligned front and rear pressure plates
  • Worn, weakened, or warped tension springs
  • Improper blade angle adjustment

Recommended Troubleshooting Steps

  • Check locking levers: Confirm all blade holder locking levers are fully tightened. Even slight movement can cause inconsistent cuts.
  • Inspect blade holder mounting: Ensure the blade holder is firmly seated on the microtome base without any play.
  • Verify pressure plate alignment: Front and rear pressure plates must apply even tension across the blade.
  • Examine tension springs: Replace worn or weakened springs that may reduce blade stability.
  • Adjust blade angle: Leica typically recommends blade angles between 5° and 10°. Adjust gradually until sectioning improves.

Cryostat Service and Repair Available Nationwide

Contact Amtech Medical →

Fast response • Nationwide service • Leica cryostat specialists

If these adjustments do not resolve the issue, the problem may involve internal microtome components such as the cam system, bearings, or specimen advance mechanism. These components require professional inspection and repair.

Cryostat Defrosting During Active Lab Hours

Unexpected cryostat defrost cycles during working hours can disrupt laboratory workflow and delay specimen processing. This issue is usually related to incorrect defrost scheduling rather than mechanical failure.

Most Common Cause

Improper defrost timer configuration

Cryostats use scheduled defrost cycles to prevent ice buildup. If the defrost timer is set incorrectly, the system may enter defrost mode during active laboratory hours.

Recommended Solution

  • Verify the cryostat internal clock is accurate
  • Schedule defrost cycles during non-operational hours (typically midnight to early morning)
  • Ensure defrost timing aligns with laboratory workflow
  • Allow sufficient defrost duration (typically 60–90 minutes)

If defrost cycles continue to occur at incorrect times despite proper scheduling, the defrost valve or control system may require professional service.

Object Head Not Advancing

If the cryostat object head fails to advance or retract properly, sectioning becomes impossible. This issue may present as unresponsive advance buttons, lack of movement when rotating the handwheel, or audible motor noise without actual movement.

Common symptoms include:
  • No response when pressing advance or retract buttons
  • Automatic advance feature not functioning
  • Motor noise without mechanical movement
  • Object head stuck in fixed position

Likely Causes

Common causes include:
  • Electronic failure such as motor malfunction or wiring issues
  • Ice buildup locking the micrometer advance mechanism
  • Mechanical obstruction within the micrometer drive system

Recommended Troubleshooting Steps

  • Perform a full defrost: Power off the cryostat, open the chamber window, and allow the unit to warm to room temperature for 24–48 hours to fully eliminate ice buildup.
  • Ensure complete dryness: Restart the system only after all internal condensation has evaporated.
  • Attempt manual advance: Set micrometer advance to maximum (50–60 microns) and rotate the handwheel to break minor ice obstructions.

Professional Leica Cryostat Repair Available

Contact Amtech Medical →

Fast response • Nationwide service • Leica cryostat specialists

If the object head remains stuck after full defrosting, the micrometer drive system or motor assembly may require professional repair or replacement.

Specimen Splintering During Sectioning (Specimen Too Cold)

Specimen splintering occurs when frozen tissue becomes excessively brittle, causing sections to fracture or fragment during cutting. This is typically caused by chamber temperatures set below recommended operating levels.

Root Cause

Excessively low chamber temperature

Temperatures below Leica’s recommended range (typically around –23°C for Mohs applications) cause tissue to become brittle and prone to fragmentation during sectioning.

Recommended Solution

  • Warm the specimen slightly: Gentle warming using body heat or brief exposure to ambient air can improve sectioning consistency.
  • Adjust chamber temperature: Leica typically recommends –23°C for optimal Mohs sectioning performance.
  • Avoid excessive cooling: Lower temperatures may accelerate freezing but can significantly reduce section quality.

Maintaining proper chamber temperature ensures consistent section quality while preserving specimen integrity.

Specimen Mushing During Sectioning (Specimen Too Warm)

Specimen mushing occurs when tissue is insufficiently frozen, resulting in compression, distortion, or tearing during sectioning. This typically indicates inadequate specimen cooling or insufficient chamber temperature.

Root Causes

Insufficient freezing or chamber cooling
  • Specimen not fully frozen prior to sectioning
  • Chamber temperature above recommended range
  • Reduced refrigeration system performance

Recommended Solution

  • Use the heat extractor block: Apply for approximately 10 minutes prior to sectioning for uniform freezing.
  • Verify chamber temperature: Ensure chamber temperature is below –21°C before sectioning.
  • Allow adequate cooling time: Ensure specimens reach full equilibrium temperature.

Cryostat Cooling System Service Available

Contact Amtech Medical →

Fast response • Nationwide service • Leica cryostat specialists

If the cryostat cannot maintain proper cooling despite adjustments, the refrigeration system, temperature sensors, or compressor may require professional service.

Cryostat Not Cooling Down

If a Leica cryostat fails to cool down properly, the chamber will remain warm and unusable for frozen sectioning. In some cases, the compressor may not engage at all, preventing the system from reaching its target temperature.

Common symptoms include:
  • Chamber temperature remains above set point
  • Compressor does not engage
  • No audible compressor operation
  • System unable to maintain cooling

Possible Causes and Troubleshooting

Several issues can prevent proper cooling, ranging from minor system errors to refrigeration component failure.

Error Codes and System Protection

Error codes such as E02, E20, E21, or E22 often indicate chamber moisture, temperature sensor issues, or system protection shutdown.

In many cases, simply acknowledging the error by pressing any button allows the system to reset and resume normal cooling operation.

Mechanical Causes Requiring Service

Potential refrigeration system failures include:
  • Compressor motor failure
  • Faulty evaporator or condenser fan
  • Refrigerant leak
  • Temperature sensor malfunction
  • Electrical control system failure

If the compressor does not engage after clearing error codes, the refrigeration system likely requires professional inspection and repair by a trained cryostat technician.

Leica Cryostat Cooling System Repair Available Nationwide

Contact Amtech Medical →

Fast response • Nationwide service • Leica cryostat specialists

Final Thoughts on Leica Cryostat Reliability and Maintenance

Leica cryostats are widely regarded as the most reliable and precise cryostats available for histology and Mohs laboratories. Their engineering quality, durability, and cutting precision make them the preferred choice for frozen sectioning worldwide.

However, like all precision laboratory instruments, cryostats require proper adjustment, routine maintenance, and occasional repair. Understanding common issues such as inconsistent sectioning, object head movement problems, temperature instability, and cooling failures allows technicians to troubleshoot quickly and minimize laboratory downtime.

Routine preventive maintenance, proper blade holder adjustment, correct temperature settings, and periodic inspection of refrigeration components help ensure long-term reliability and optimal performance.

Need Help with Your Leica Cryostat?

Amtech Medical provides nationwide cryostat service, preventive maintenance, and repair for Leica cryostats and histology laboratory equipment.

Request Cryostat Service →

Fast response • Nationwide coverage • Leica-trained technicians

The Most Common Problems with Midmark Chairs (And How to Fix Them)

Adjustable medical examination chair for healthcare diagnostics and patient comfort.

Midmark exam chairs are some of the most trusted and widely used pieces of equipment in medical and dermatology practices. Known for their heavy base plate (weighing around 400 pounds), these chairs maintain a low center of gravity, offering unmatched stability even with heavier patients raised high in the air. Compared to lighter alternatives like Silverfox chairs, which lack a stabilizing base and can feel top-heavy, Midmark chairs are safer, sturdier, and built with high-quality American-made motors and components.

They don’t use real leather — instead, Midmark opts for synthetic fabrics and plastics in non-structural areas, while relying on durable metals and actuators that are designed to outlast most competitors. Still, no piece of equipment is immune to wear and tear. Below are the most common Midmark chair problems users encounter, what causes them, and how to fix or prevent them.


Hand Controller Cable Damage

One of the most frequent (and preventable) issues involves the hand controller. Many users hang the controller over the armrest mounting rail, letting it dangle. Over time, the constant tension frays the coiled black cord, eventually exposing internal wires. Once this happens, the controller stops working and the only fix is a replacement cable — a $350 part.

Signs to watch for:

  • Cracks or breaks in the black coiled cord
  • Exposed wires underneath the plastic insulation
  • Intermittent or no response from the controller

Solution: Avoid hanging the controller on the armrest. Instead, use inexpensive mounting buttons or holsters (around $7 each) that attach to the armrest rails. These keep the controller secure and dramatically reduce wear on the cord.

ED treatment table with medical ergonomic design for healthcare facilities.

Midmark Mounting Button

Product Page

Footrest Not Moving Up or Down

If the footrest isn’t responding, it’s often not an electrical issue at all but rather a safety lockout built into the chair’s design.

Common causes:

  • The storage drawer located beneath the seat isn’t fully pushed in. If extended, it blocks footrest movement to prevent a collision.
  • The footrest extension is partially pulled out. Unless fully retracted, the chair won’t allow movement.

Fix:

  • Push the under-seat drawer fully in until it clicks.
  • Retract the footrest extension completely.
  • If the problem persists, unplug and replug both the chair and the controller to reset connections.

These are simple user checks that can save a service call.


Chair Completely Unresponsive (No Movement at All)

Sometimes a Midmark chair will stop responding entirely after a power surge or fluctuation. This happens when the control board’s memory is disrupted.

First steps to try:

  • Unplug and replug the chair.
  • Disconnect and reconnect the controller.

If that doesn’t work, the issue may require a memory reset procedure on the main board. Important note: this must be performed by a certified technician. Attempting to reset the board incorrectly can further corrupt the memory and even damage the circuitry, requiring a full board replacement.

Other possible causes include blown fuses or a failed control board, but these are usually diagnosed after the simpler checks.


Controller Ports and Connector Damage

Another frequent issue comes when multiple controllers (hand and foot) are plugged in. Sometimes the hand controller stops working while the foot control still functions.

The culprit is often the connector at the back of the chair. Staff walking around the chair may accidentally kick the plug, bending or damaging the small pins inside. Once bent, the controller will no longer communicate with the chair.

How to fix:

  • Disconnect the controller and inspect both sides of the connector. Look for bent or broken pins.
  • Check the socket on the chair itself for damage.
  • If damaged, send the controller in for service or replacement.

Prevention: Install a protective security bracket around the connector. These brackets act like guards, preventing accidental kicks from damaging the port.


Actuator Motor Wear

Though Midmark uses durable American-made actuator motors, they can wear out over years of use. Signs include jerky chair movement, failure to fully raise or lower, or strange noises when adjusting positions.

Solution: Worn actuators require replacement. While less common than cable or connector issues, actuator failure is still a predictable maintenance concern after long-term use.


Best Practices to Prevent Midmark Chair Problems

  • Always use holsters or mounting buttons for hand controllers.
  • Keep the under-seat drawer and footrest extension fully retracted before adjusting chair positions.
  • Protect connectors with security brackets to prevent accidental kicks.
  • Unplug and replug after power fluctuations before calling for service.
  • Schedule preventive maintenance yearly to inspect actuators, fuses, and wiring.

Final Thoughts

Midmark chairs stand apart from cheaper alternatives thanks to their heavy base plate, stability, and reliable American-made motors. However, even the best chairs require proper handling and maintenance. Most problems — from damaged cords to blocked footrests — come down to user habits and can be avoided with simple best practices.

By addressing small issues early and taking preventive steps, you can dramatically extend the life of your Midmark exam chair while reducing costly repairs and downtime.

/product

The Most Common Problems with the Cutera Enlighten (and How to Fix Them)

Cutera Enlighten Troubleshooting

The Cutera Enlighten is a premium dual-pulse laser system widely used for tattoo removal and advanced dermatologic treatments. Utilizing both picosecond and nanosecond pulse technology, the Enlighten provides superior treatment efficiency, faster results, and reduced tissue damage compared to older laser systems.

Its advanced optical architecture allows clinics to deliver precise, controlled energy to targeted tissue, making it one of the most effective tattoo removal and pigmentation treatment systems available today.

Why Proper Maintenance is Critical

The Enlighten’s advanced optical and calibration systems require routine maintenance to ensure consistent performance. Issues such as lens contamination, calibration drift, and optical component wear can reduce treatment effectiveness and lead to system errors.

This guide covers the most common Cutera Enlighten problems, explains their causes, and outlines practical solutions to help minimize downtime and maintain optimal performance.

Loss of Treatment Effectiveness (Dirty or Damaged Lens Insert)

One of the most common Cutera Enlighten performance issues is reduced treatment effectiveness caused by contamination or damage to the handpiece lens insert. This issue can develop gradually and may not trigger any error codes, making it difficult to detect initially.

Common symptoms include:
  • Reduced treatment effectiveness
  • Slower tattoo clearance
  • Decreased visible tissue response
  • No system error codes present

Root Cause

Lens contamination or optical damage

Debris such as skin particles, hair, treatment residue, and carbon buildup can accumulate on the lens surface. Over time, laser exposure may also cause permanent burn spots in the lens coating, reducing optical efficiency.

Recommended Solution

  • Inspect the lens insert regularly for contamination or damage
  • Clean the lens daily using 91%+ isopropyl alcohol or acetone with a lint-free applicator
  • Replace lens inserts when performance declines
  • Use manufacturer-approved replacement components
Why this matters:

Maintaining a clean, undamaged lens ensures maximum energy delivery, faster treatment results, reduced procedure time, and improved patient satisfaction.

Cutera Enlighten Error Code 1530 – Energy Detector Mismatch

Error Code 1530 is a safety-related fault that prevents laser operation when internal energy measurements are inconsistent. This protects patients and ensures accurate energy delivery.

Common symptoms include:
  • Laser will not fire
  • Error Code 1530 displayed on screen
  • System shutdown during operation

Root Cause

Energy calibration mismatch

The Enlighten contains redundant energy detectors. If their readings differ by more than approximately 20%, the system shuts down to prevent unsafe operation.

Resolution

This issue requires professional calibration by a qualified laser service technician. Energy detectors must be tested and recalibrated using specialized diagnostic equipment.

Cutera Enlighten Calibration and Repair Available

Contact Amtech Medical →

Fast response • Nationwide service • Certified laser technicians

Cutera Enlighten Error Code 1125 – Delay Line Failure

Error Code 1125 indicates failure within the laser’s delay line system, which controls switching between picosecond and nanosecond pulse modes.

Common symptoms include:
  • Laser will not fire
  • Error Code 1125 displayed
  • Failure across all treatment modes

Root Cause

Delay line optical component failure

Most commonly caused by failure of the Liquid Crystal Retarder (LCR), which controls laser pulse timing and wavelength switching.

Professional Cutera Enlighten Repair Available

Contact Amtech Medical →

Nationwide service • Fast turnaround • Experienced technicians

Preventive Maintenance Best Practices

  • Clean lens inserts daily
  • Schedule annual preventive maintenance
  • Inspect optical components regularly
  • Address error codes immediately
  • Maintain proper cleaning protocols

Final Thoughts on Cutera Enlighten Reliability and Maintenance

The Cutera Enlighten remains one of the most advanced and reliable laser systems available for tattoo removal and dermatologic treatments. Its dual picosecond and nanosecond capabilities provide exceptional clinical results, allowing providers to deliver faster treatments with improved precision and patient outcomes.

Like all high-performance laser systems, consistent maintenance is essential to ensure optimal performance. Many common issues—such as reduced treatment effectiveness, calibration mismatches, or optical component wear—can be prevented through routine inspection, proper cleaning, and scheduled preventive maintenance.

By addressing minor issues early and maintaining proper service intervals, clinics can extend the lifespan of their Enlighten system, minimize downtime, and maintain consistent treatment quality. When more complex issues arise, professional service ensures the system is properly calibrated, repaired, and returned to peak operating condition.

Professional Maintenance Protects Your Investment

Routine preventive maintenance, optical cleaning, and calibration ensure your Cutera Enlighten continues delivering reliable, consistent performance. Proactive service reduces unexpected downtime and protects the long-term value of your laser system.

Need Help with Your Cutera Enlighten Laser?

Amtech Medical provides nationwide Cutera Enlighten service, repair, calibration, and preventive maintenance.

Contact Amtech Medical →

Fast response • Nationwide service • Certified laser technicians